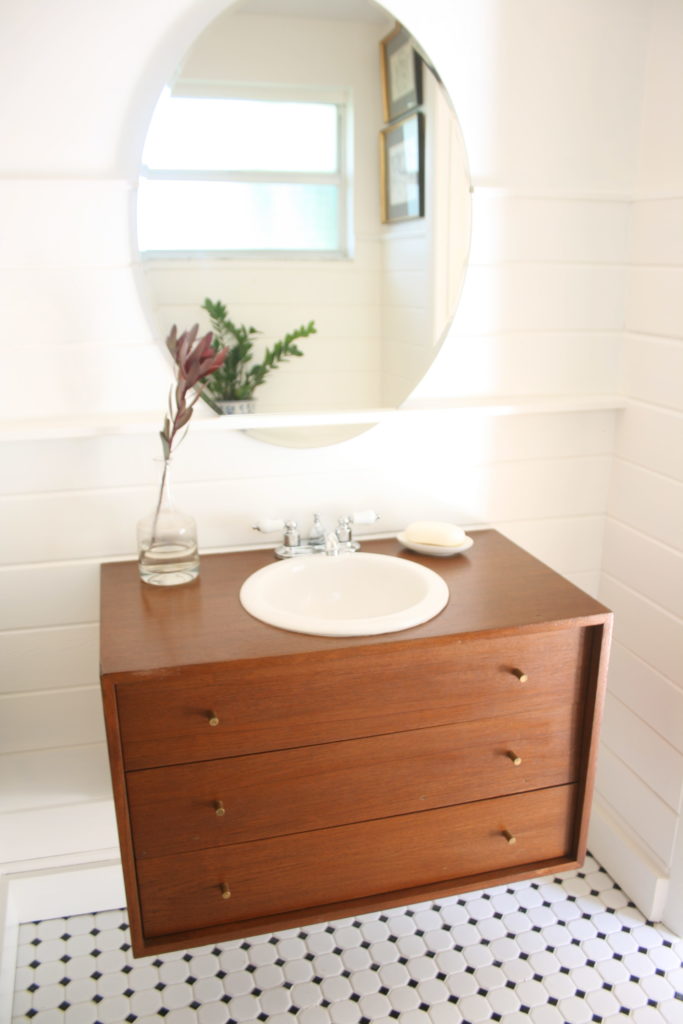
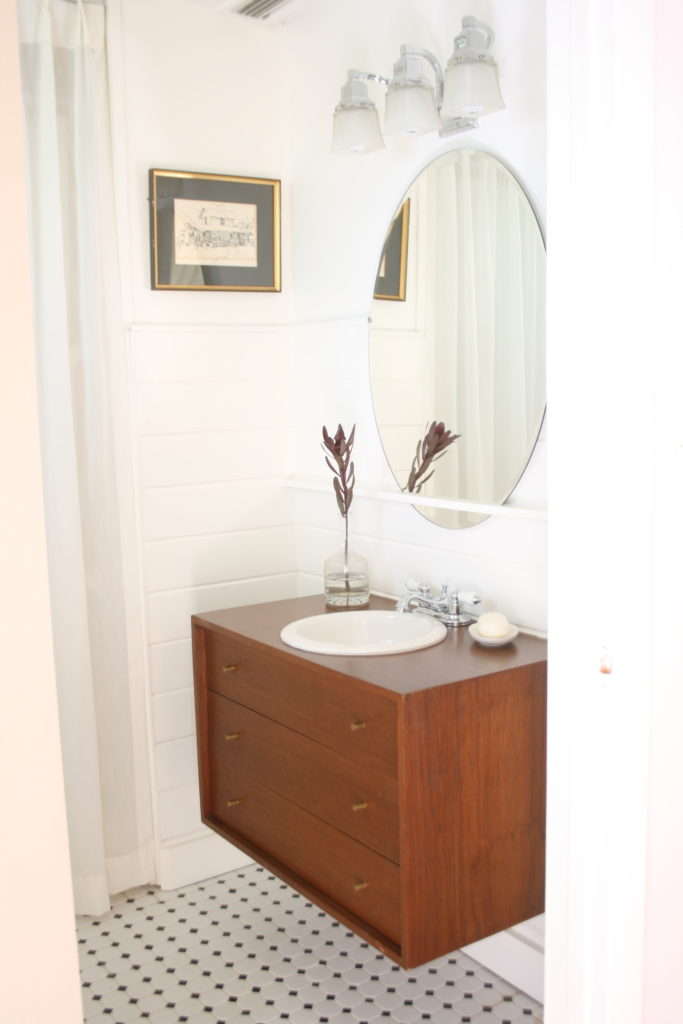
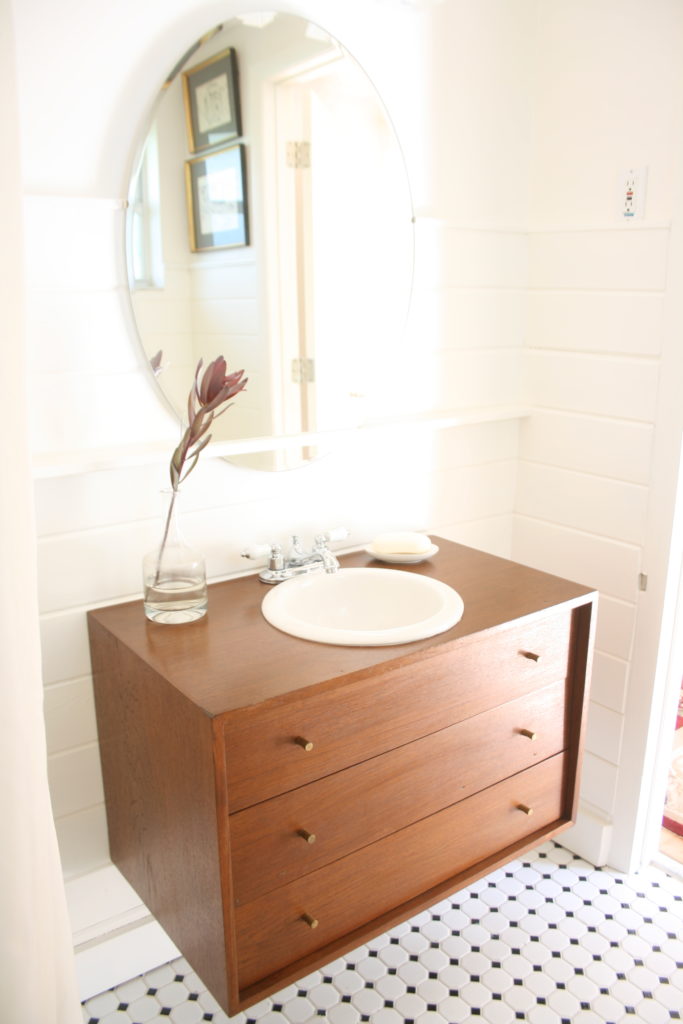
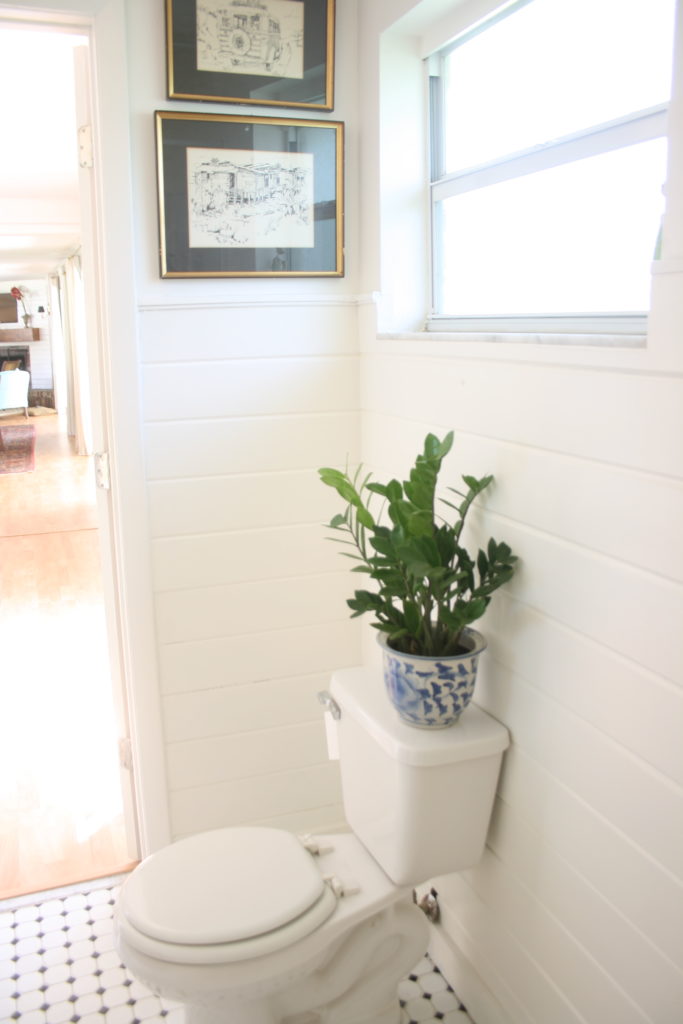
This guest bath makeover, that I started only the week before having out of town guests, was supposed to be a quick cover up job. Just a “refresh” is what I had in mind. It all started with some tongue and groove pine I salvaged from my neighbors demolition a few months ago. It was my intention to use it shiplap style directly over the top of the existing tile to avoid stripping the tile off the wall.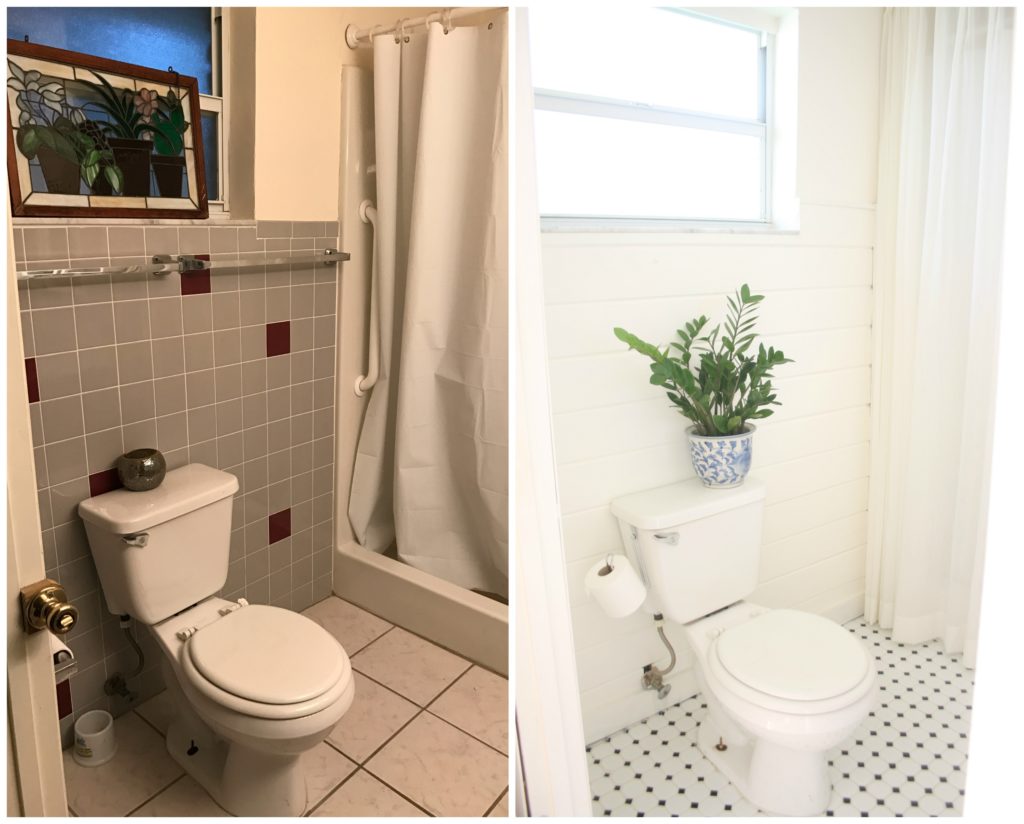
My entire “refresh” list included: make a new floor to ceiling shower curtain, cover the ugly wall tile with ship lap, install a new vanity, sink, faucet and mirror. I never intended to take out all the tile on the walls and floors, remove the toilet, and replace drywall, but this remodel had different plans for me.
When I cut the first piece of pine to cover the tile I quickly realized it wouldn’t work. First, it was too thick to fit behind the toilet. Second, the thickness would stick out way past the door trim. And finally I didn’t really have a way to fasten it to the tile(too heavy for glue alone). If I used 1/8″ thick plywood or hardboard it would’ve worked, but I already accumulated all this pine and stored it under my kids slip and slide for months, so I wasn’t about to scrap it. So I got out my flat pry bar and removed the tile.
I wasn’t planning to retile the bathroom floor either. My intention was to just fill in the holes under the old vanity with some new tile very similar to what’s already in the bathroom and throw down a large area rug. I dreaded taking up the toilet and possibly breaking it upon removal, and dealing with the new wax ring and gasket was more than I wanted to deal with.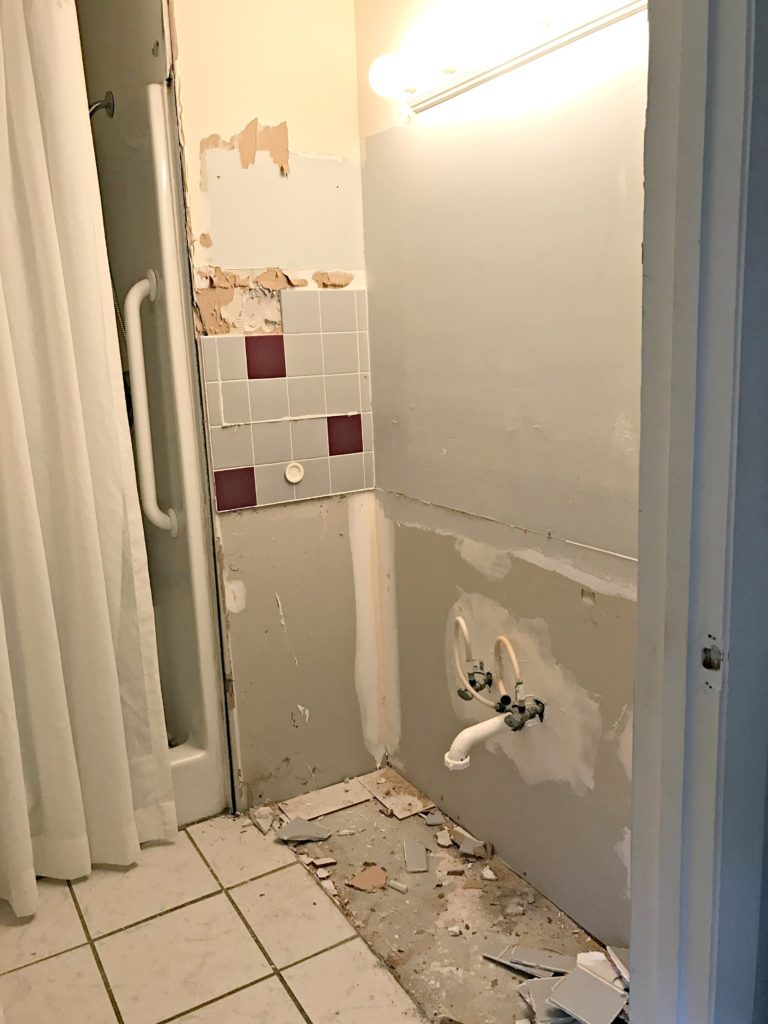
It was the Habitat Restore tile that sealed the retiled floor deal. I happened upon it while I was shopping for a sink, and I couldn’t pass up the $1 per square foot price and traditional yet vintage looking style.
So, to get on with the prices and see how I did it for $200…
shiplap walls…free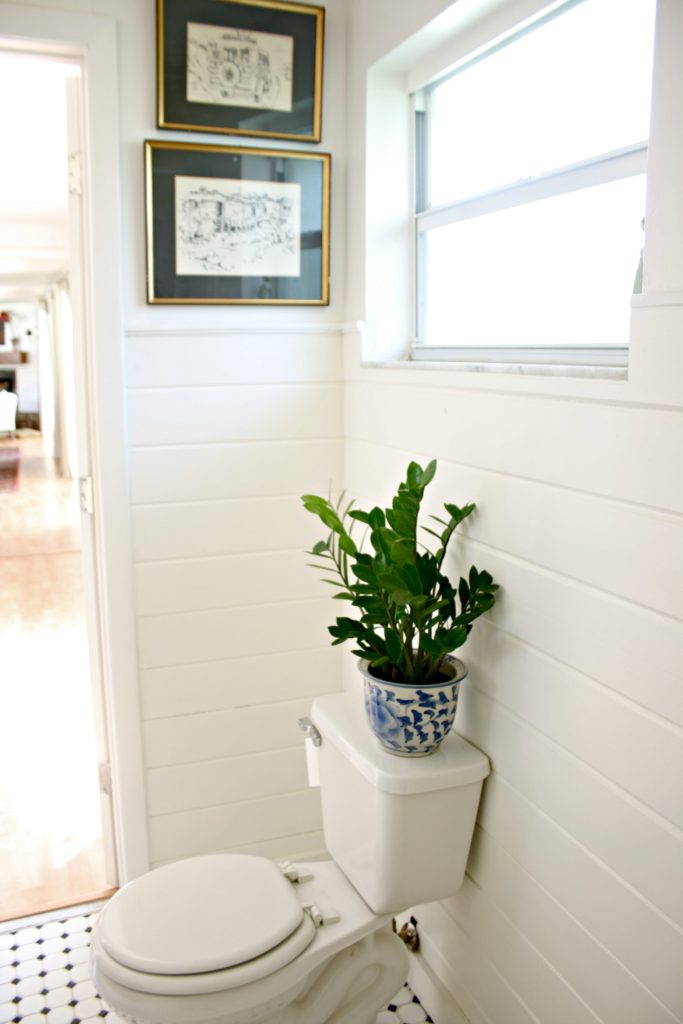
vanity…$14 from local thrift store(it was marked $24 but I used a $10 off frequent shopper discount)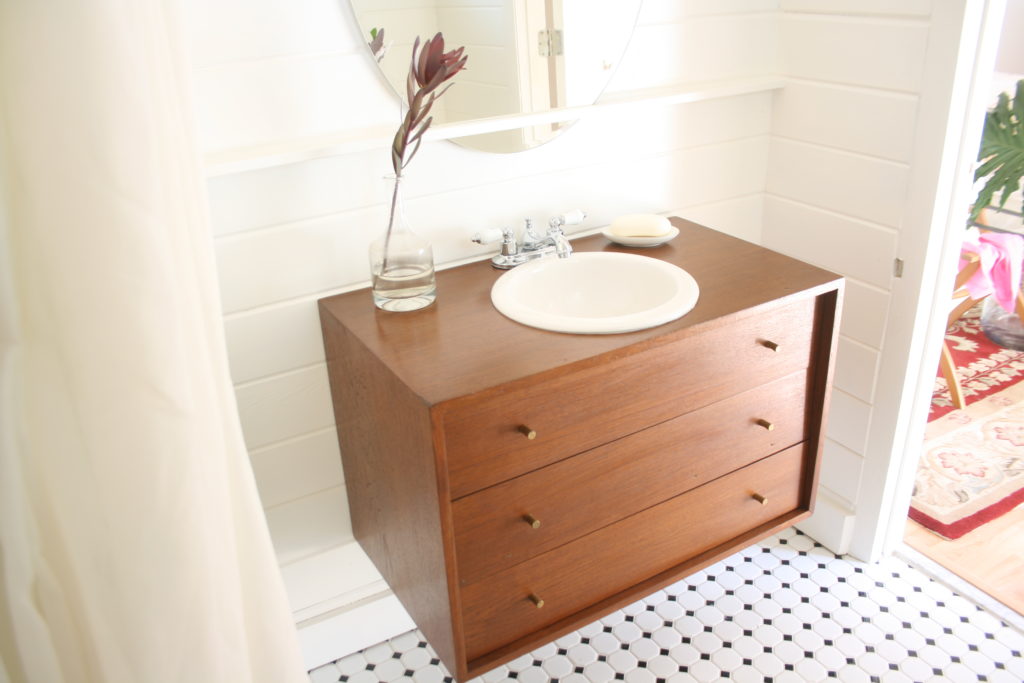
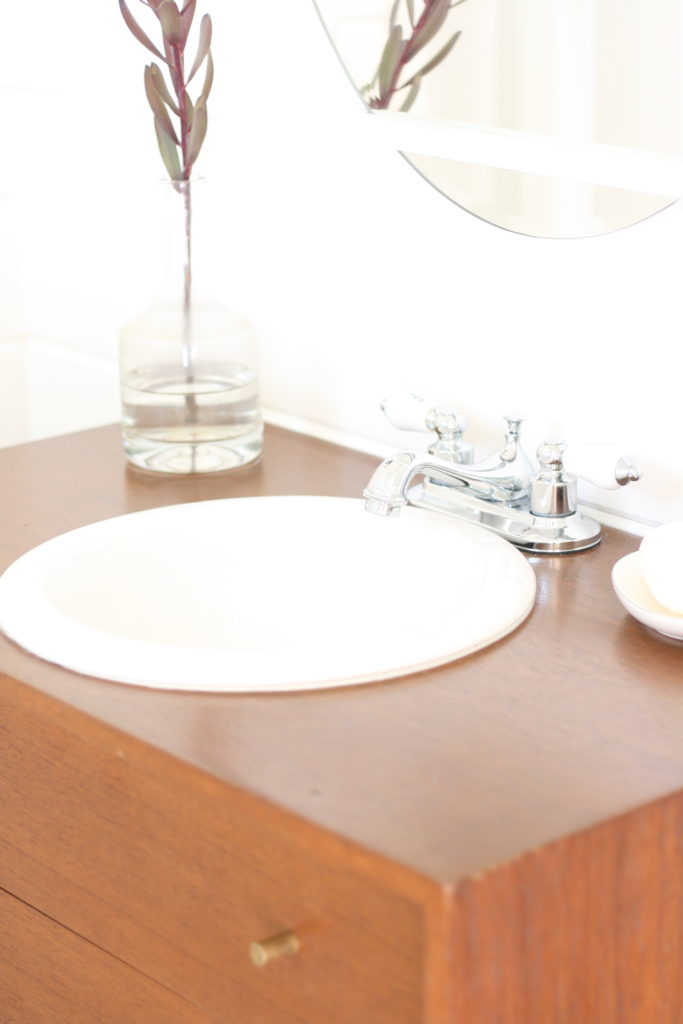
sink…$40 craigslist
faucet $32 Home Depot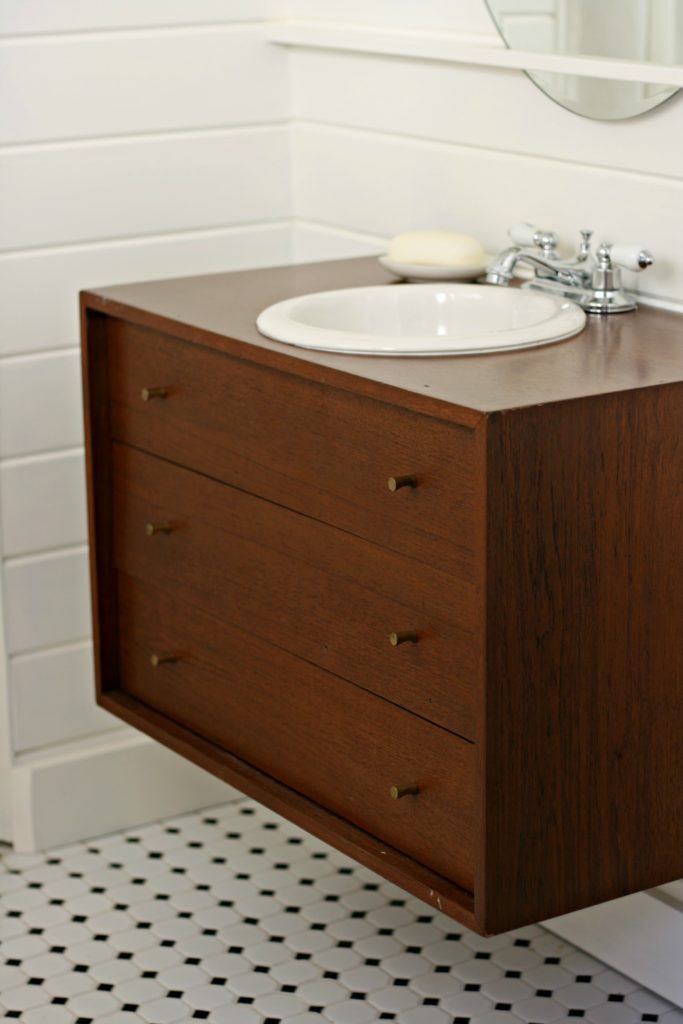
Mirror $10 craigslist
vanity light fixture $10 habitat restore 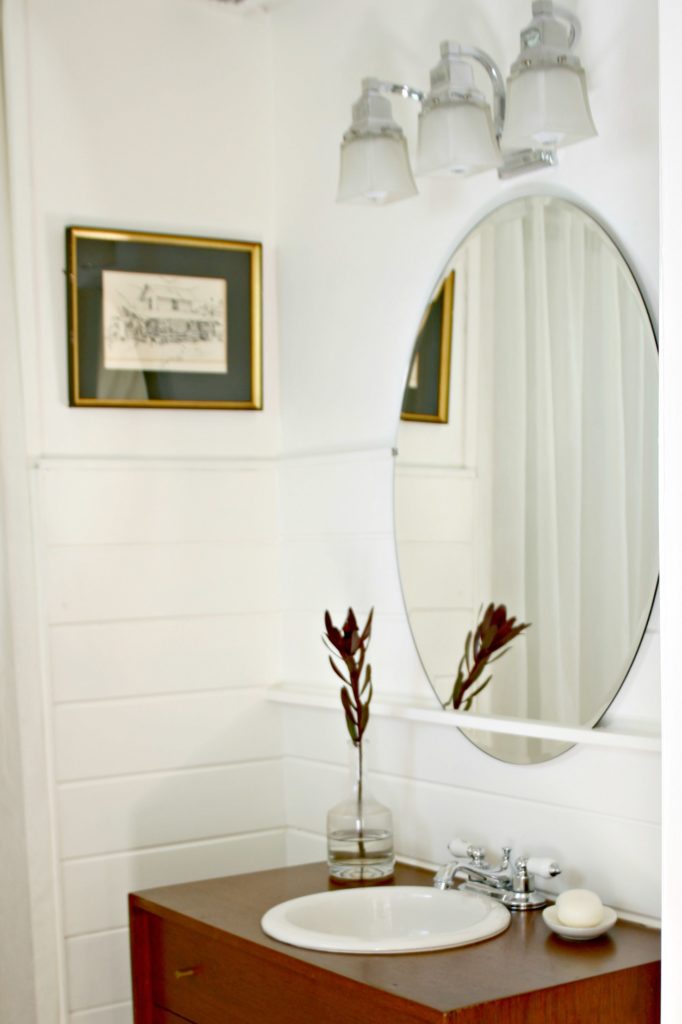
floor tile…$40 habitat Restore
thin set and grout…$21 Home depot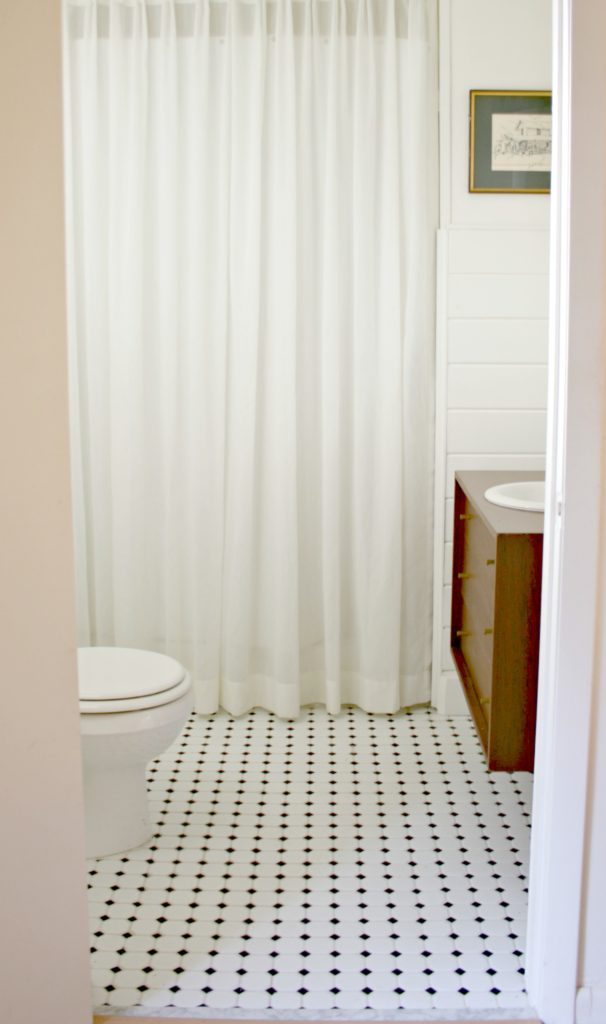
random trim…$12 Home Depot
Mirror clips…$4 home depot
Shower curtain…home made with fabric I had.
shower curtain track…$7 Ikea
wax ring…$4 Home Depot
caulk…$6 Home Depot
paint…left over from kitchen cabinets
screws and random hardware…used what I had.
I feel like I could have done a tutorial for each step of this project but I was in a pretty big hurry to finish it up so I didn’t take pictures until after my company went home.
If you have any questions about any aspect of this project feel free to comment. 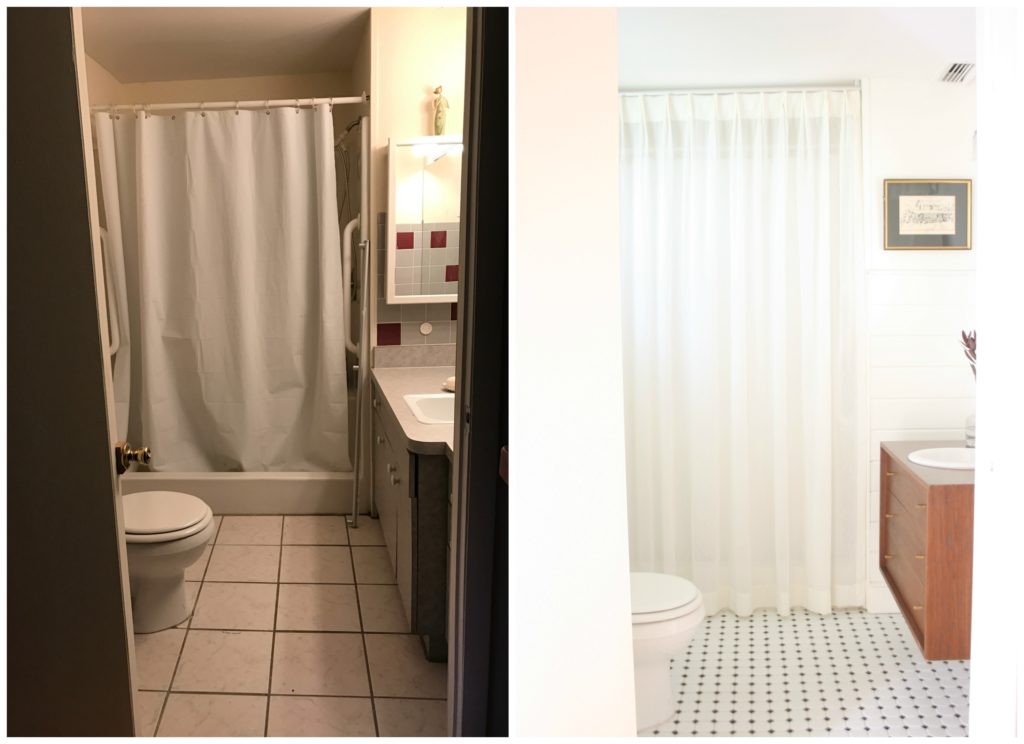 One more before and after because I just can’t help myself.

 a few before and afters…
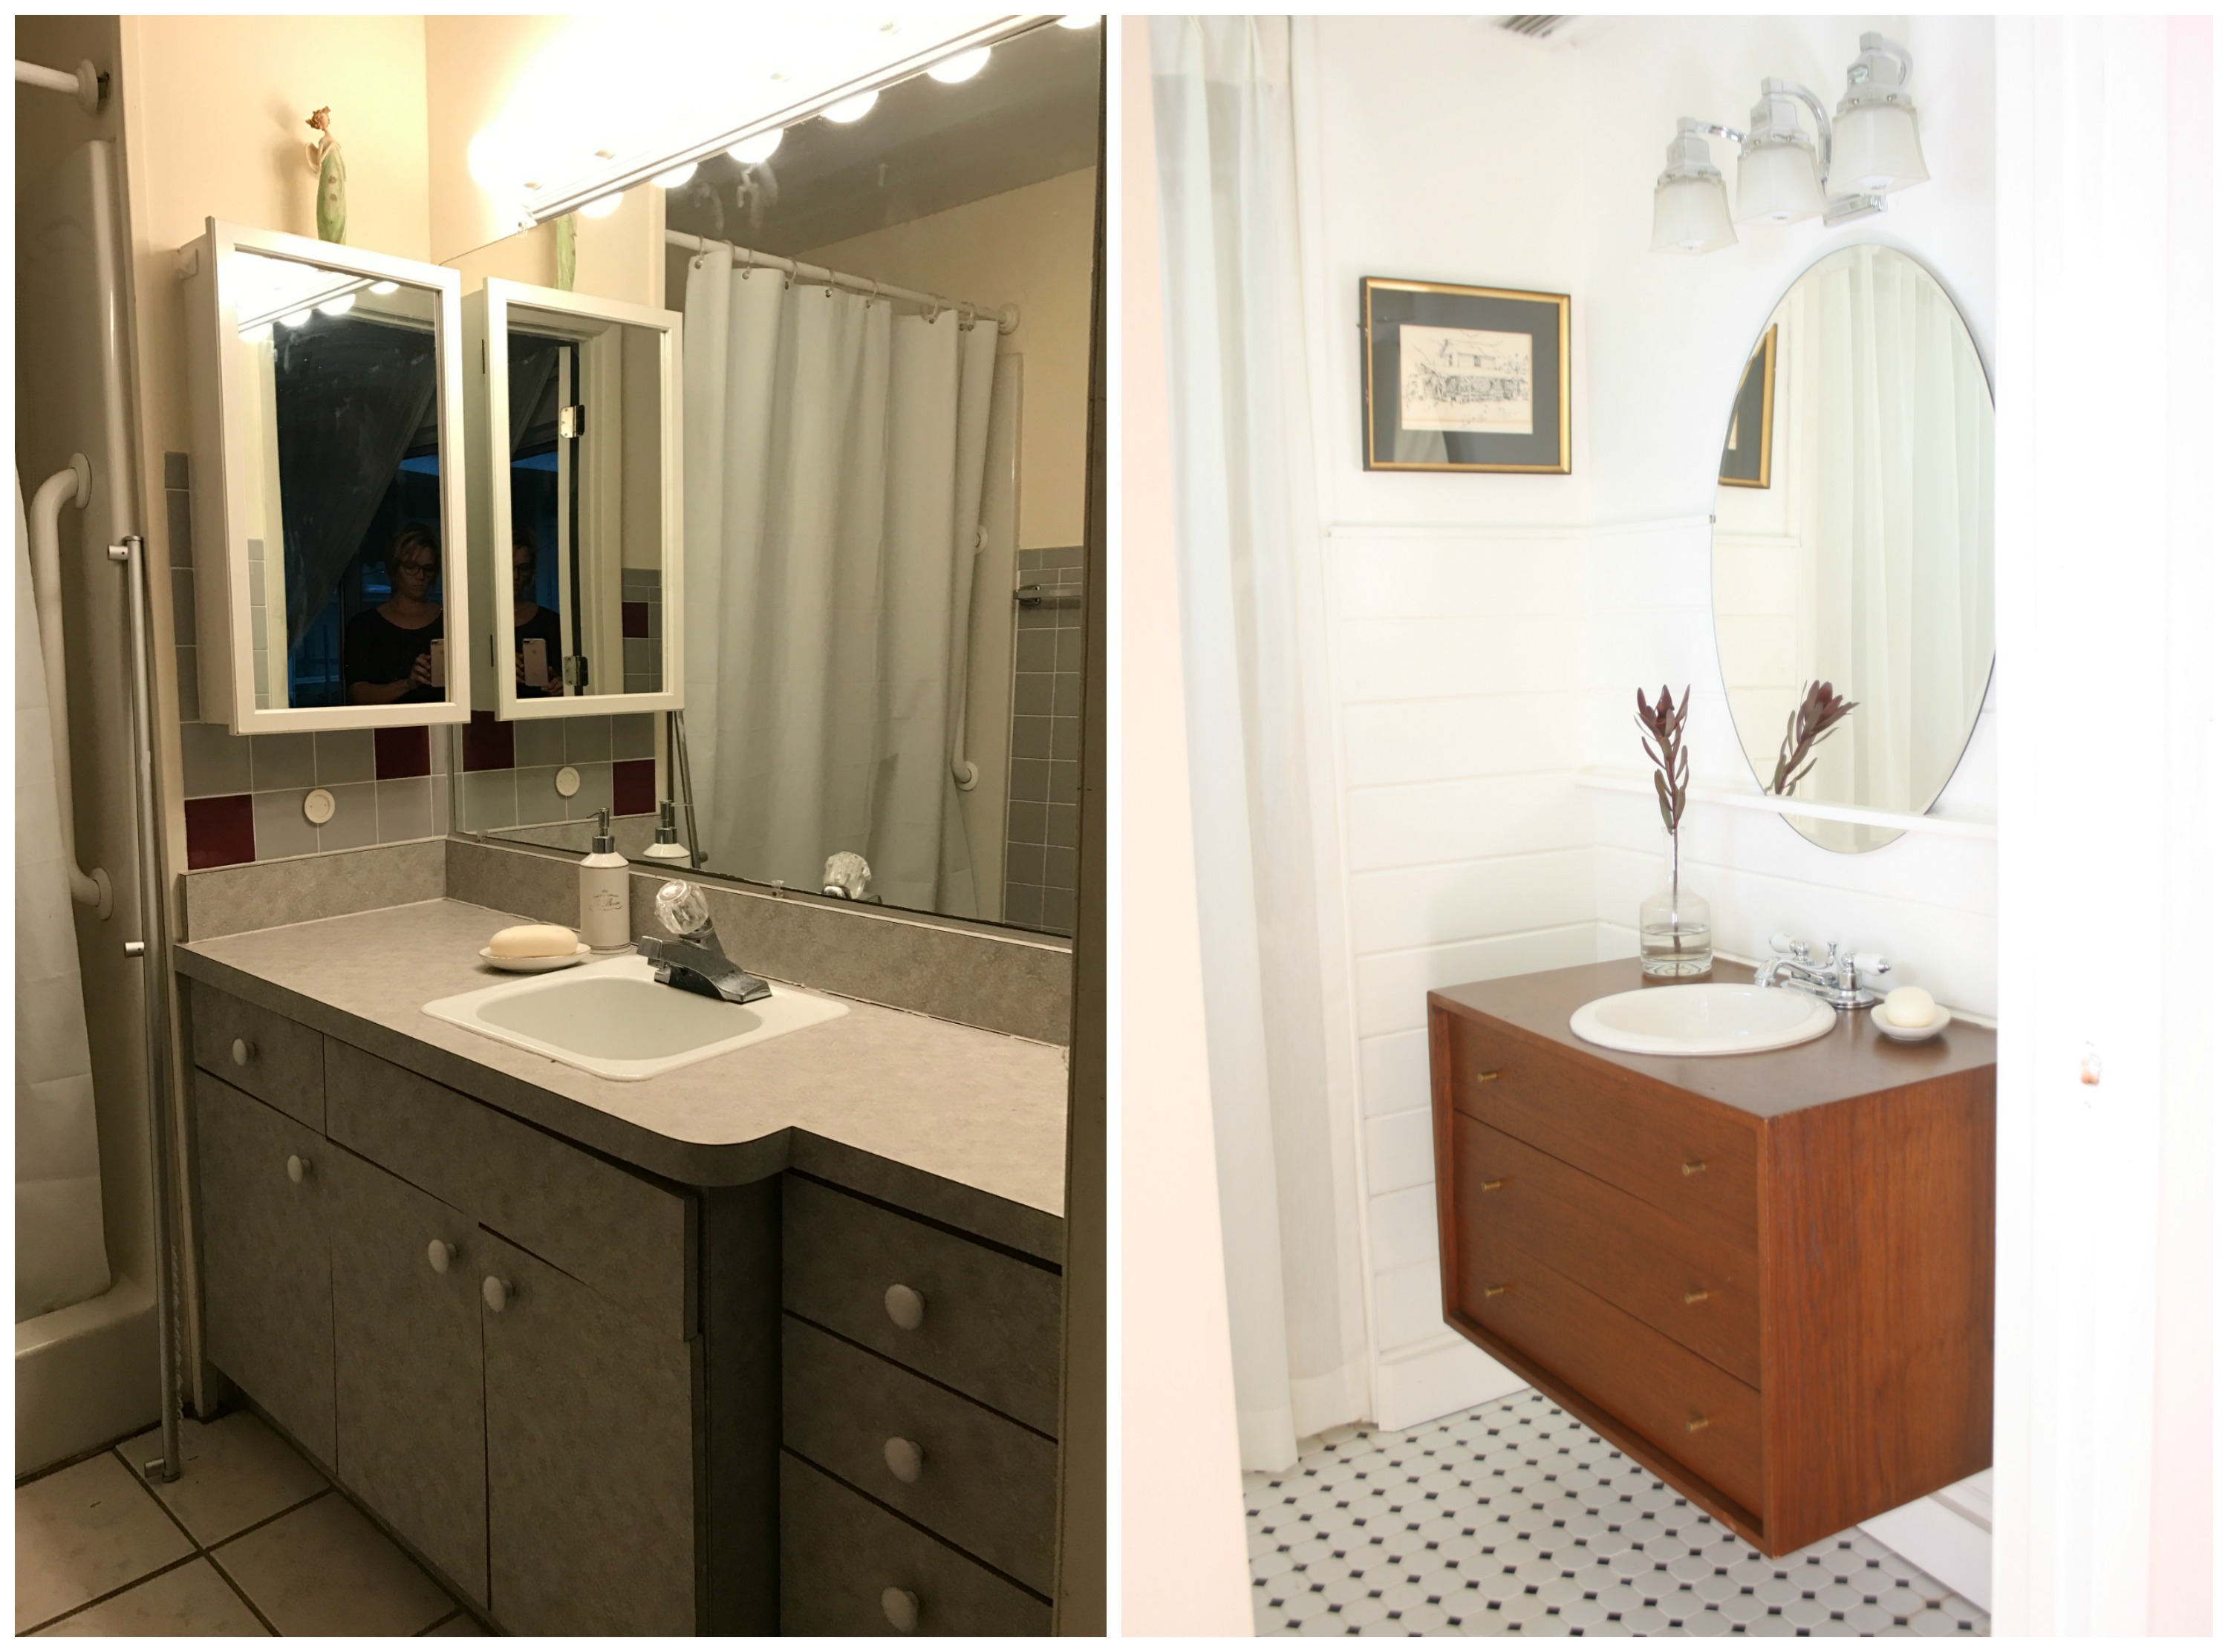 A huge improvement right? Looking back at these pictures I can’t believe I lived with it so long.
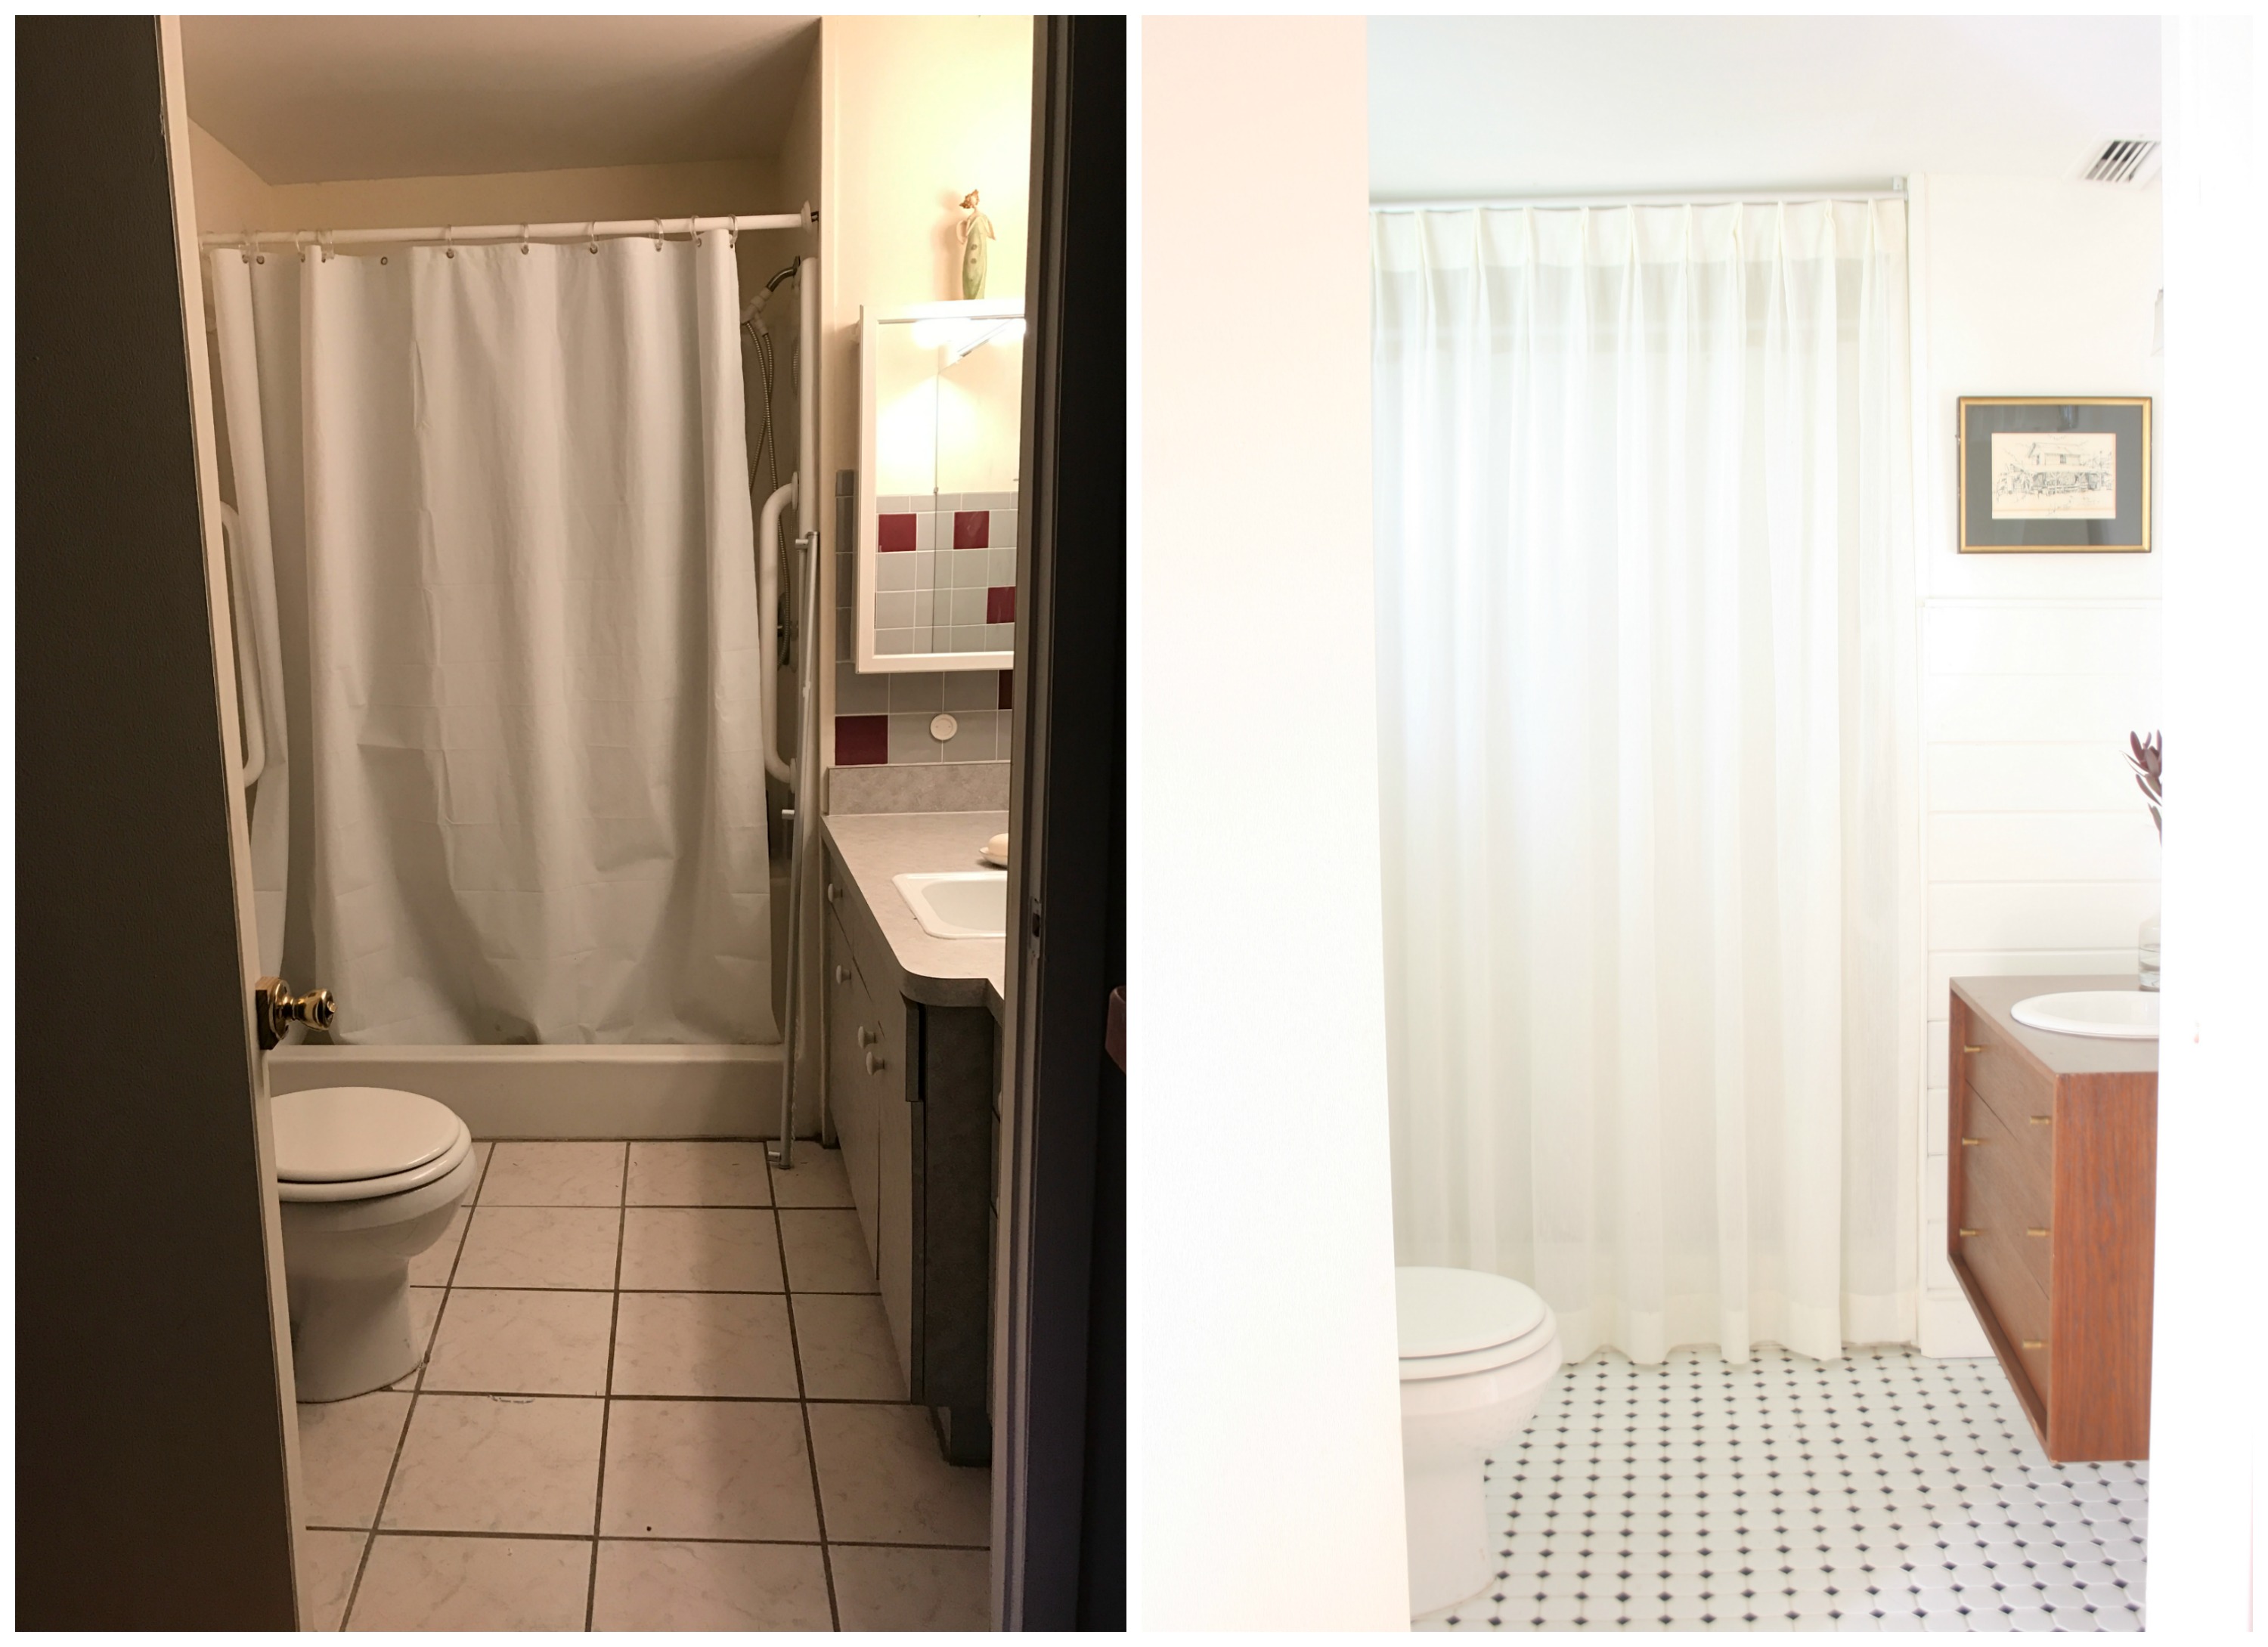 Ouch!
Ouch!
 So, to accommodate our large family and avoid storing additional tables I made these two tables according to
 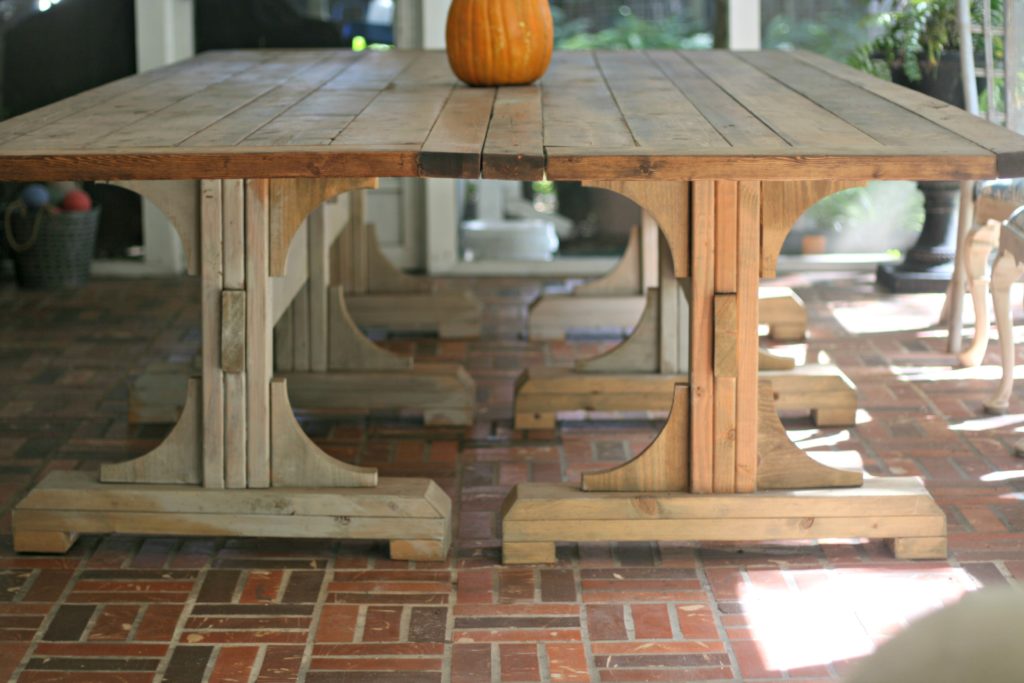 Most of the year I have my tables set up side by side so I can still have my comfy couch seating area my swinging bed. (Everyone’s favorite place after a big meal)….
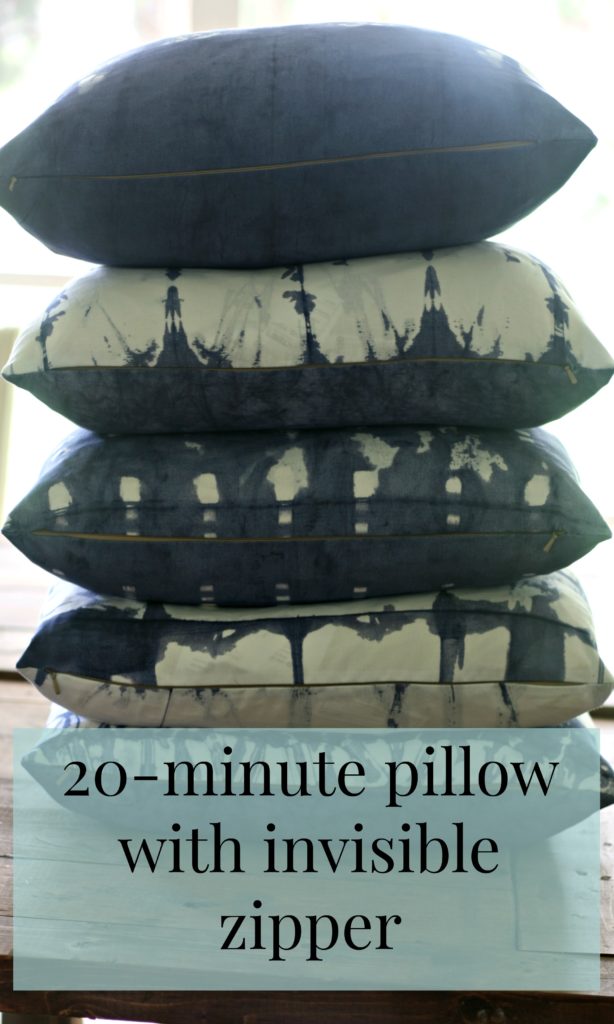
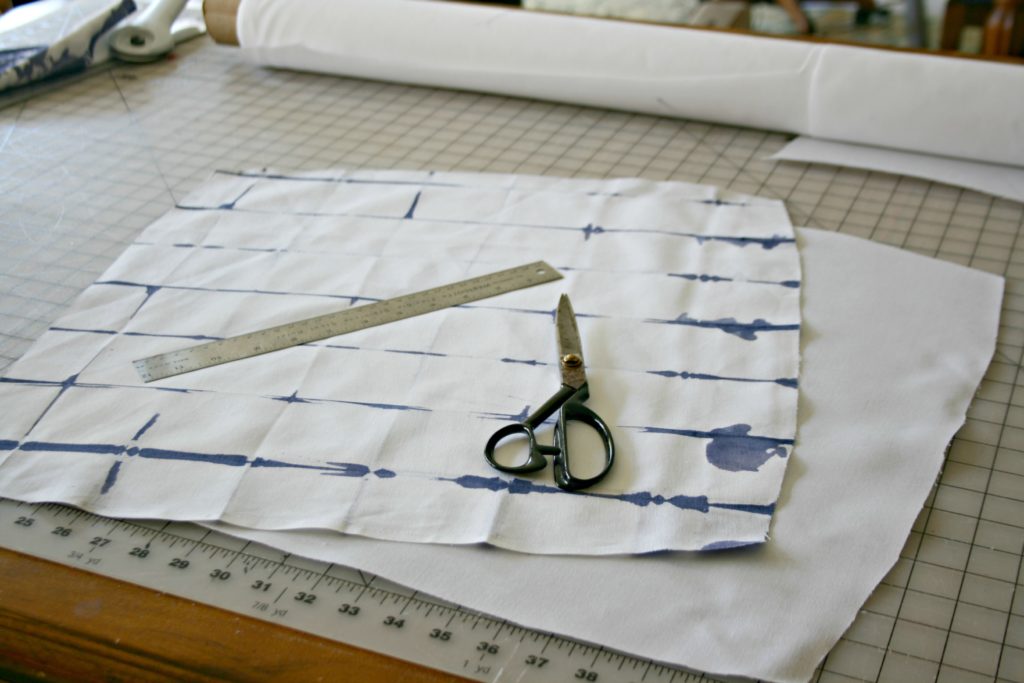 I cut out the front and back of the pillow at the same time. Stack the front and back of the pillow neatly and line up the edges to match.
 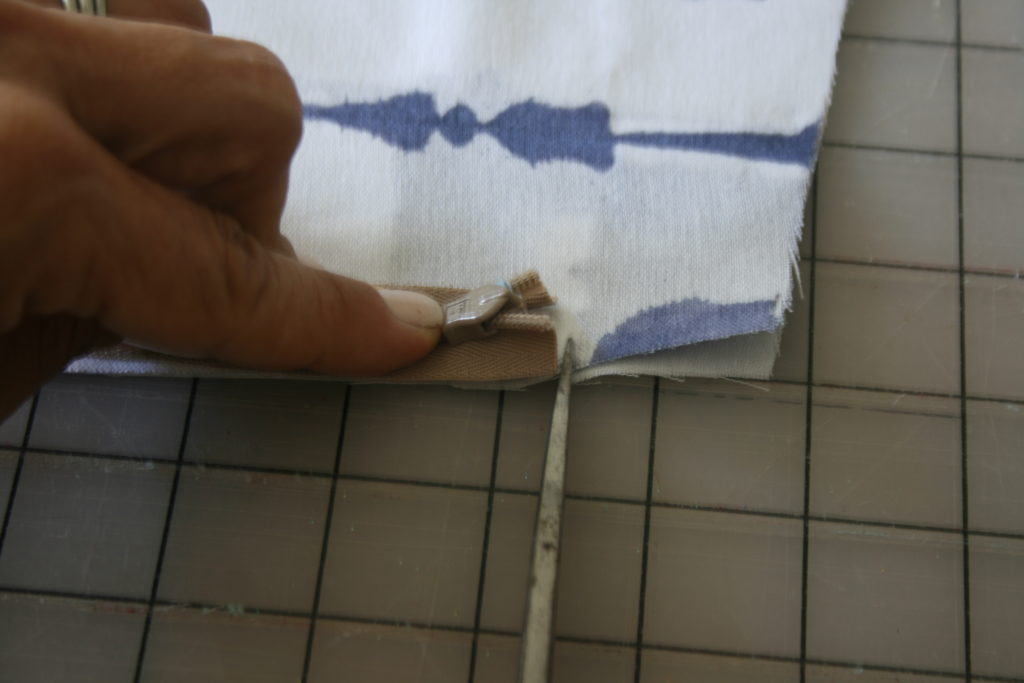 Center the zipper on the bottom edge of the pillow and snip a notch on both ends of the zipper(about 1/8″ deep) to mark where the zipper will be sewn into the pillow.
 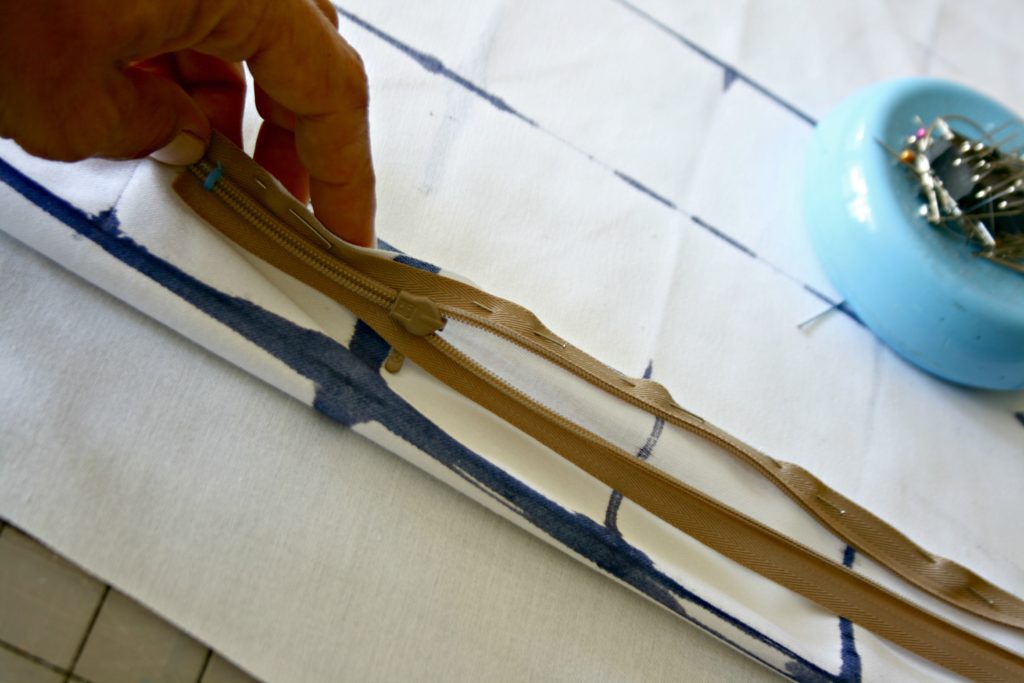 Open the zipper all the way and pin the right side of the zipper to the right side of the front of the pillow, with the end of the zipper starting at the notch you cut. Then pin the other half of the zipper to the right side of the back of the pillow. Then zip the zipper to make sure you have it right.
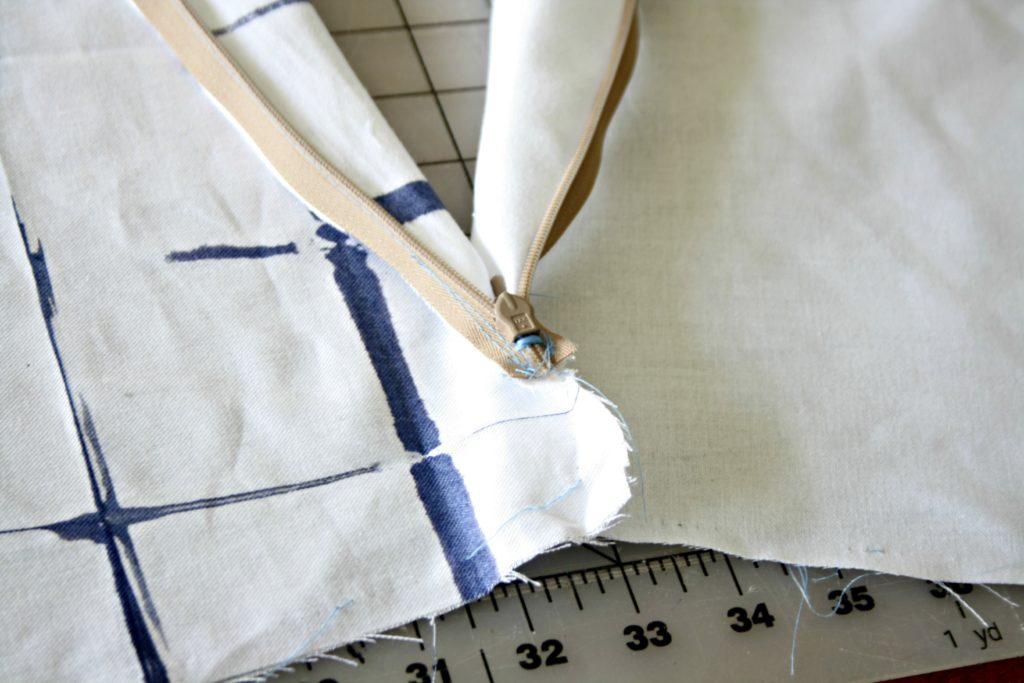 The fabric is right side to right side with the zipper pull down(facing away from you which will end up being the outside of the pillow). When the pillow is finished and turned right side out, the only thing you’ll see is the pull.
 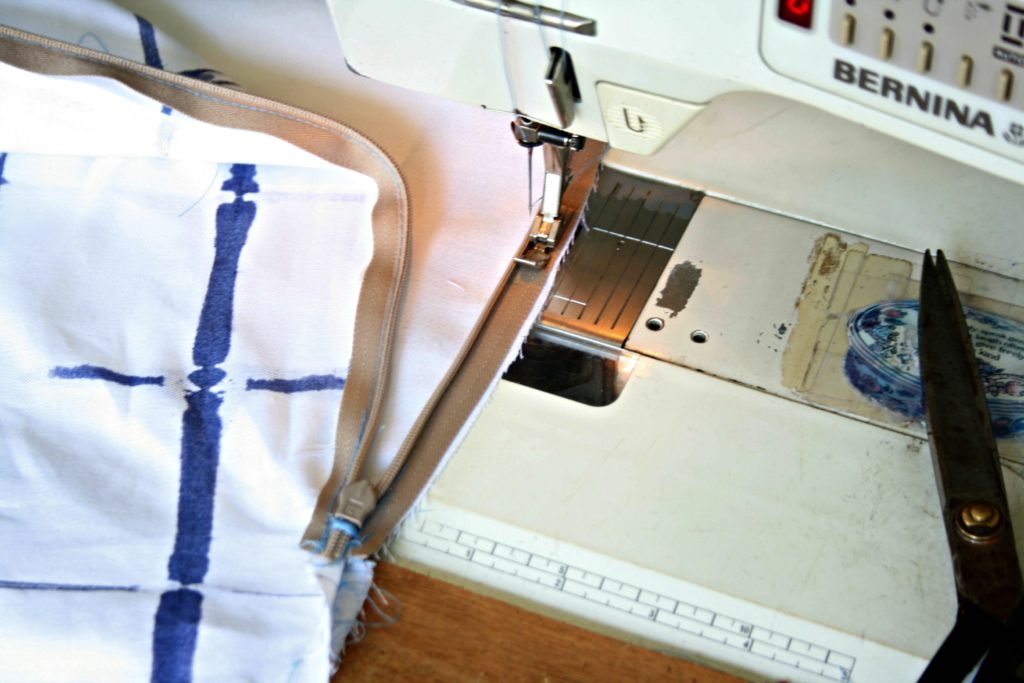 Take your pinned zipper to the sewing machine and sew the zipper as close to the zipper teeth as possible. This part must be done with the zipper open or you won’t be able to sew close enough to the teeth to make the zipper invisible. You also won’t be able to get close enough around the pull, you’ll have to close the zipper partly and sew the portion where the pull was again.
 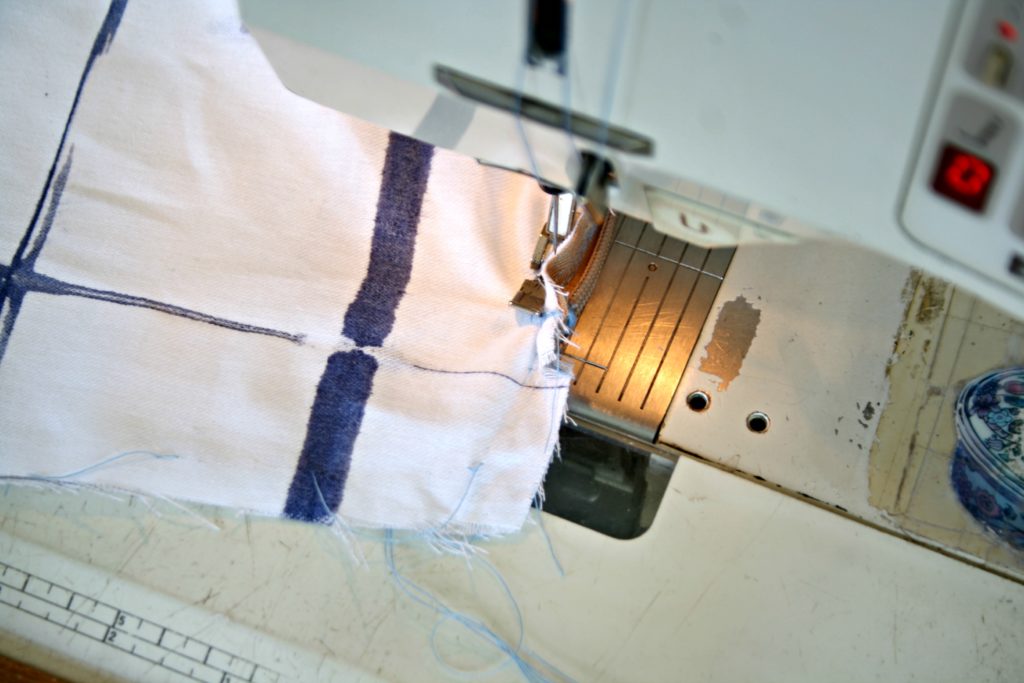 Then you sew all the way around the pillow with a 5/8″ seam allowance. I start right next to the zipper about 1/4-1/2″ from the end of the zipper, so when the zipper is closed there’s no gap at the end of the zipper tape.
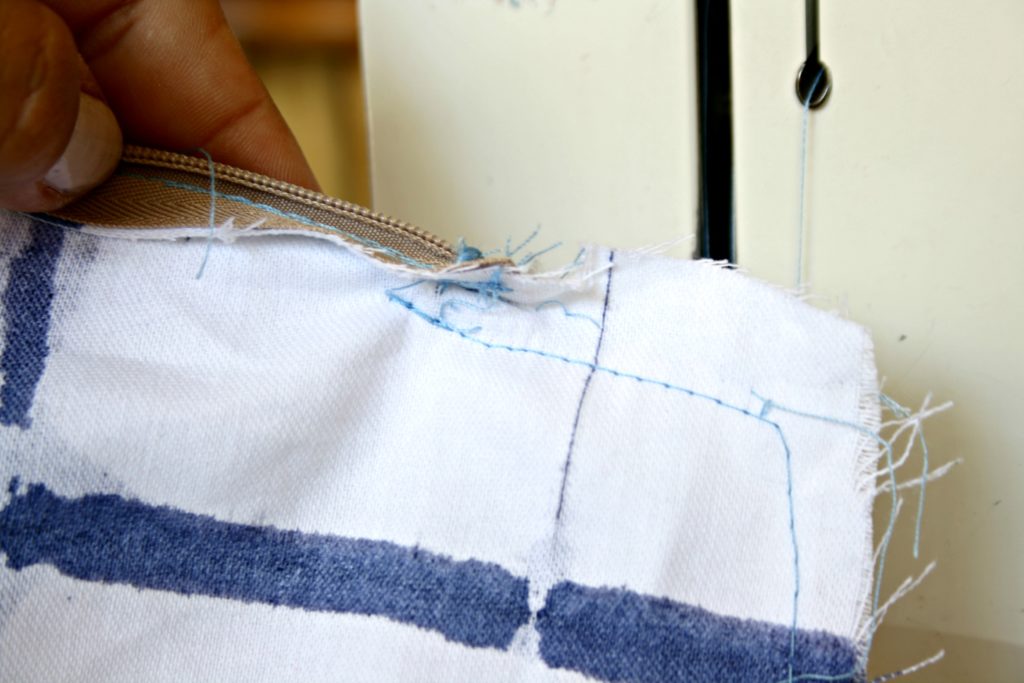 See how I sewed right next to(or on the inside of) the zipper about 1/2″ ? You want to sew as close as possible to the zipper without hitting it.
 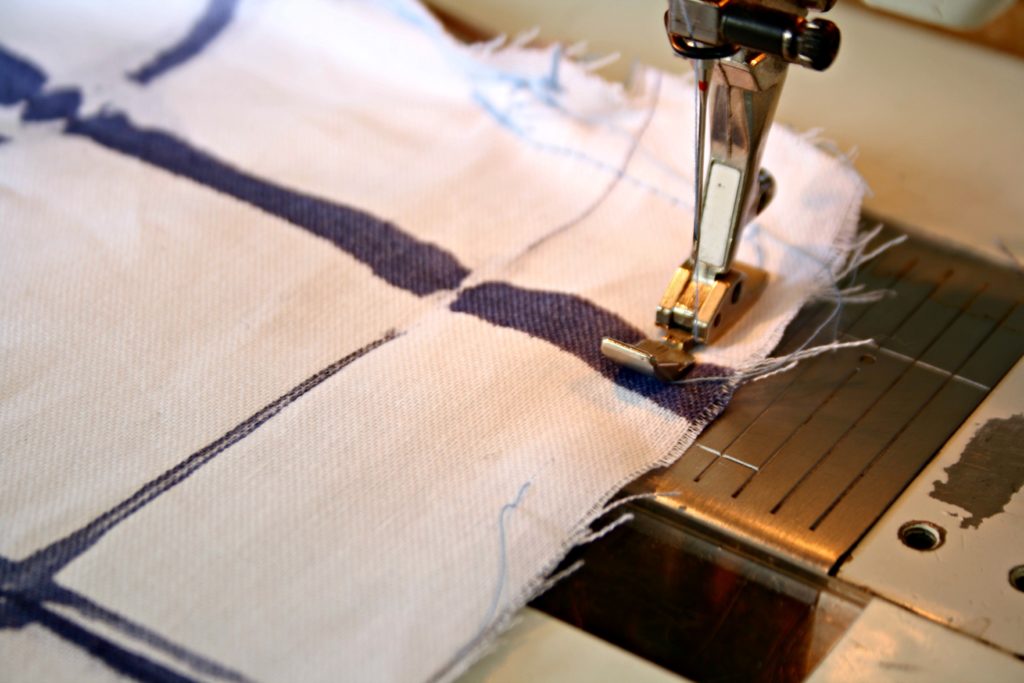 That’s it, sew 5/8″ all the way around and your done. Turn your pillow right side out and stuff it with your filler of choice. I like the IKEA feather inserts. They come in 20″ square, 26″ square and I think 20 x 26″. By far the best price around.
 I made a video with these same instructions, I think it’s easier to understand on video.
 The original fabric peeking out from under the slip.
 A lovely floral fabric in decent shape, but just not my style.
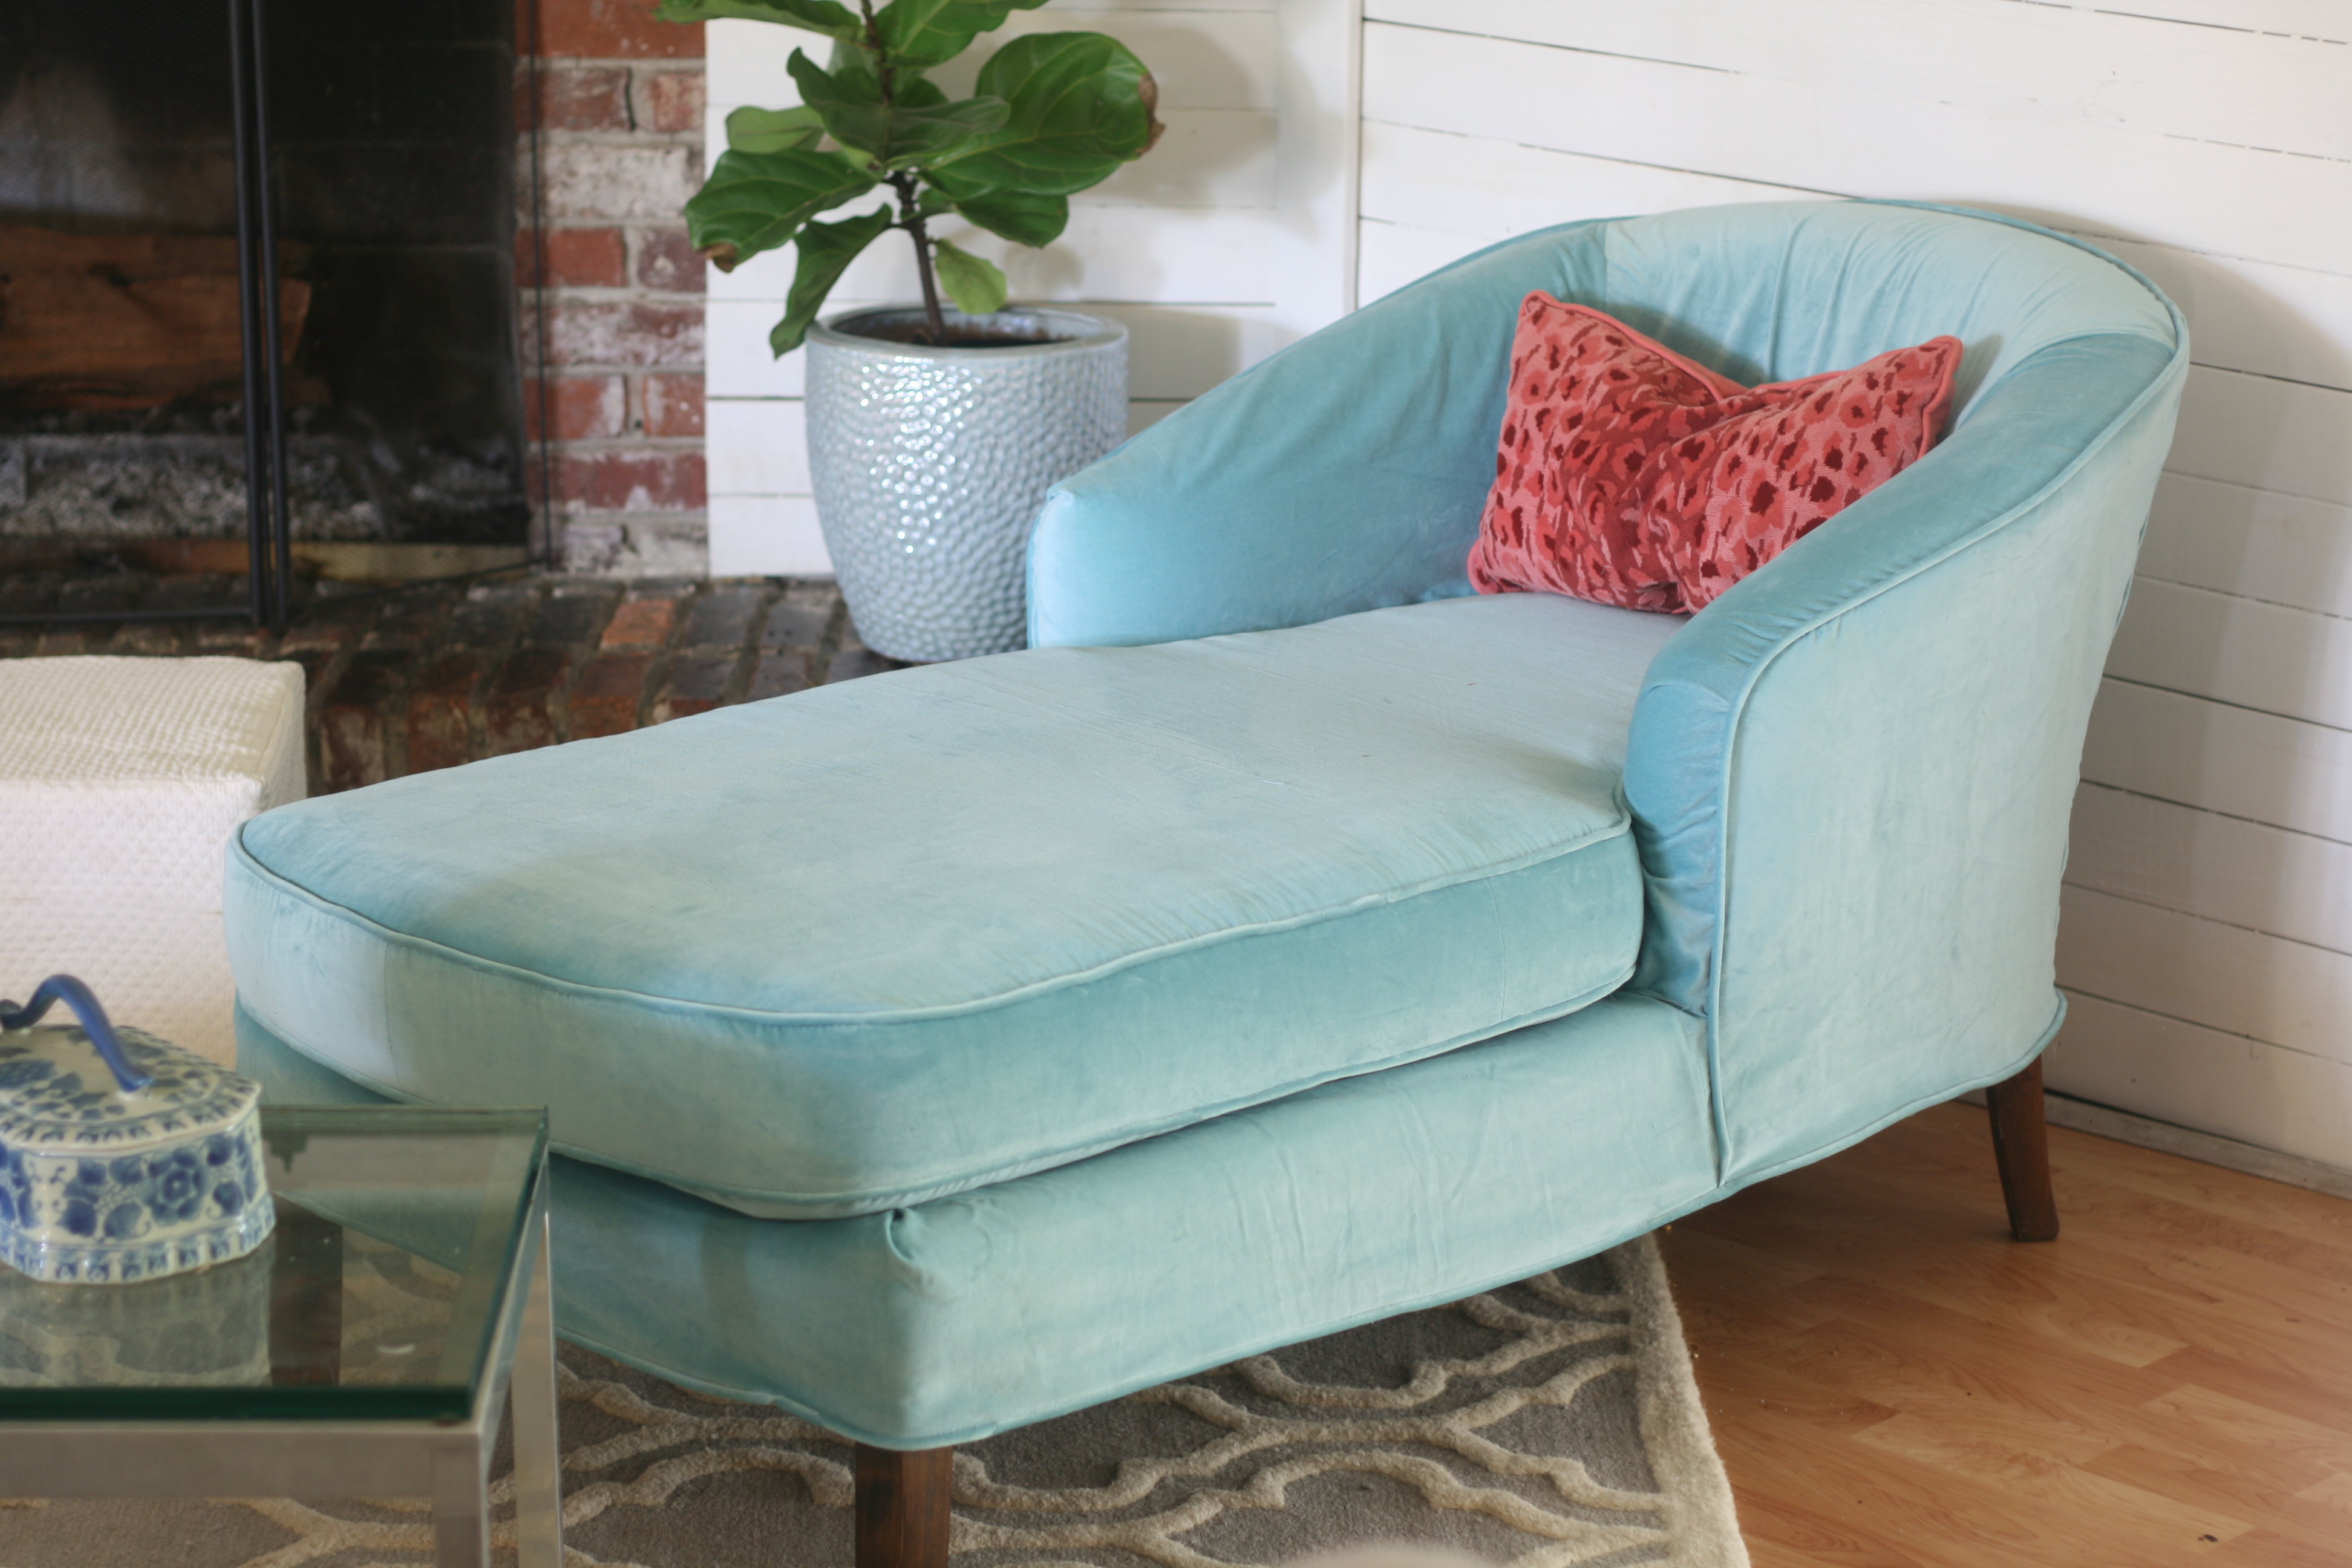
  I was hoarding these two clearance IKEA curtain panels in my fabric stash with the intention of making two twin headboards for my guest room, but never came up with a solid plan for that room. Since then, my guest bedroom plans have changed numerous times so I decided to use the curtains for this chaise. I’m so glad I did, it’s so soft and comfy.
 This skirt-less style slipcover is the easiest and fastest slipcover to make. Finish it off with welt and it’s done (although you could just as easily hem it).
  This chaise originally had a floor length skirt with box pleats. It looked a little frumpy so I immediately tore the skirt off and it instantly made it better(flowers and all).