This fireplace reface started more than ten years ago, shortly after we bought our house. So this tutorial on how to reface a fireplace will be my second attempt at it. And this time I think I’ll be much happier with it.
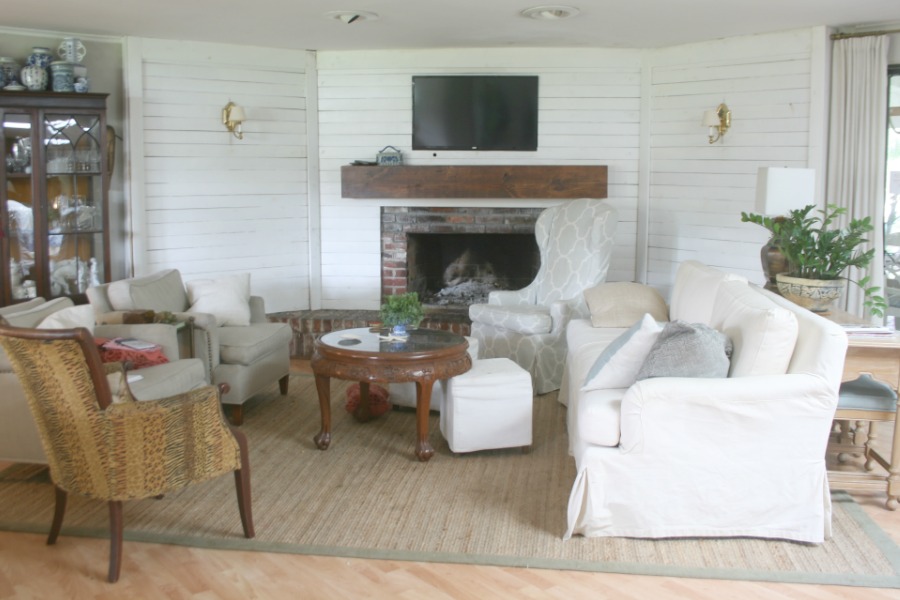
This was the look we lived with for 10 years. This is the 2009 version… at the beginning of the shiplap trend. I guess at the time I didn’t know about ripping thin plywood into strips to make faux shiplap, so I used 1 x 4’s to cover the brick. I neglected to space the 1 x 4’s so some of the lumber is touching and some is not, contributing to the messiness of the whole thing. Or…maybe over time the lumber shrunk and warped and that’s why it looks so bad now. Either way, I thought it looked pretty good when I first installed it, but over time it deteriorated.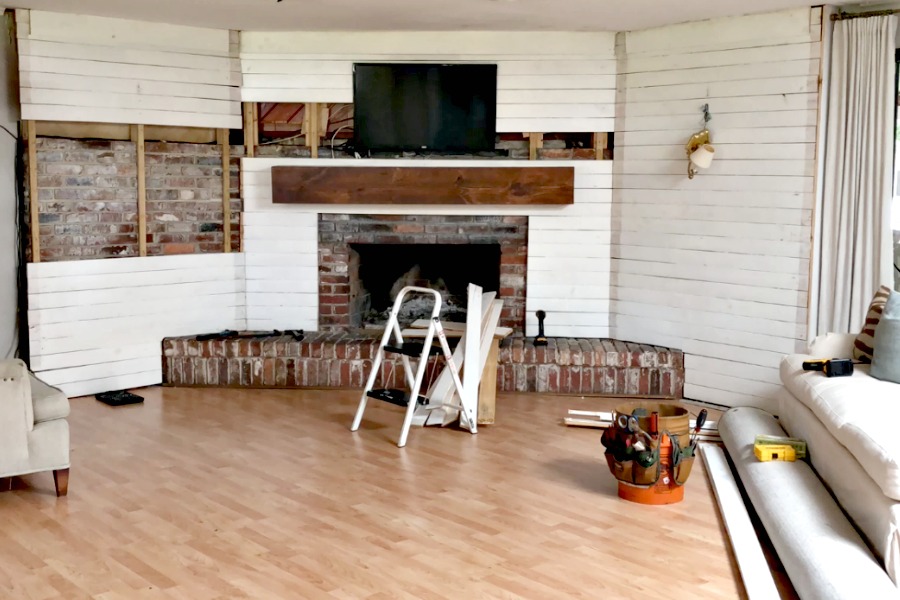 The only advantage of this wall treatment was the gap created by the furring strips where I could hide the TV and sconce cords.
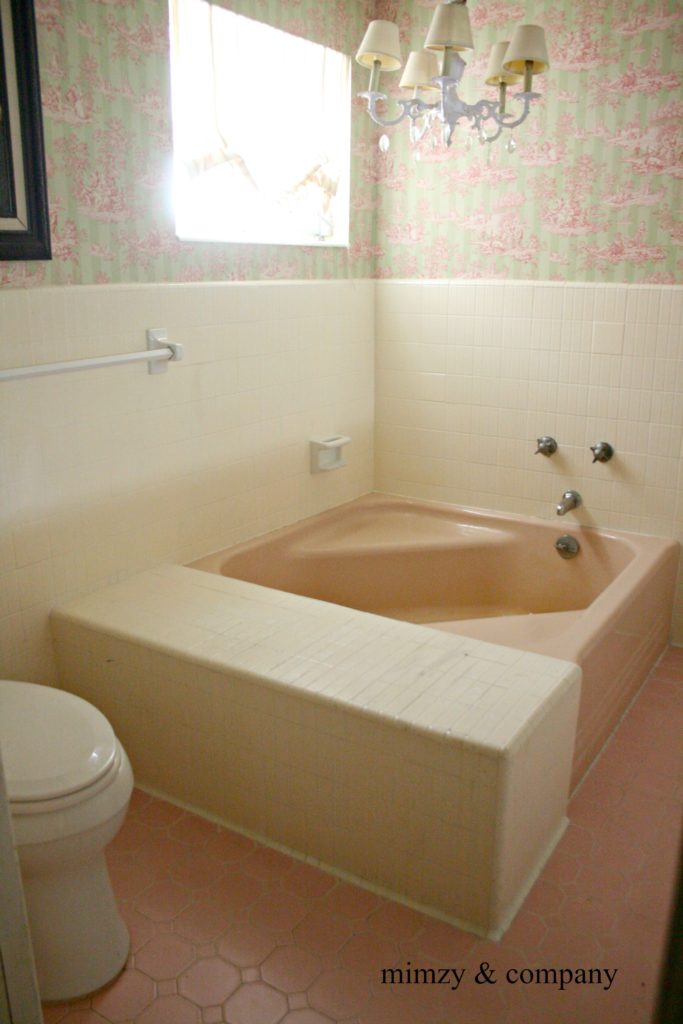
This is almost exactly how it looked when me moved in, except the diagonal cedar went all the way across the top. So terrible…especially since our ceilings are not even 8′ tall. The horizontal line of the brick 3/4 up the wall makes the ceiling feel even shorter. I really wish I could have taken out the hearth as well and made the firebox come down to the floor, but that would call for a professional for sure. oy…
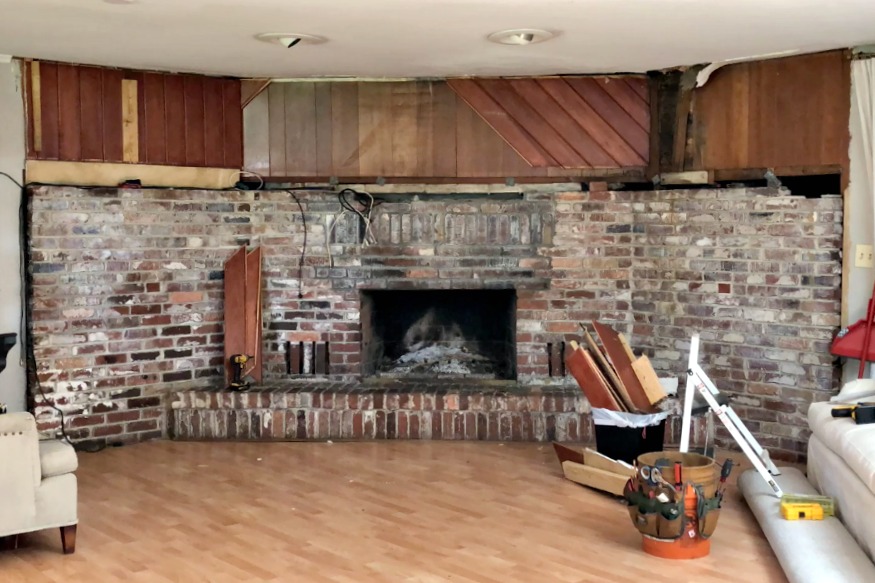
My initial plan on the morning I decided to tackle this project was to take the brick off the side walls and stack it on top of the center bricks to create a floor to ceiling brick fireplace similar to the lovely picture below.
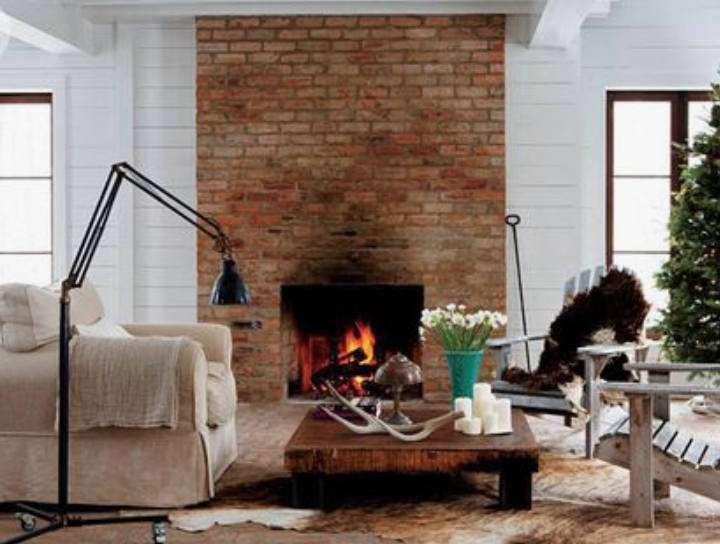
This was the image in my minds eye when I sat staring at the tired faux shiplap wall that morning, I thought to myself…self this won’t be that difficult and it should be nearly free. Just some mortar and elbow grease. ha! I think that’s how most projects start.
Two weeks later and a lot of rubble hauling later…
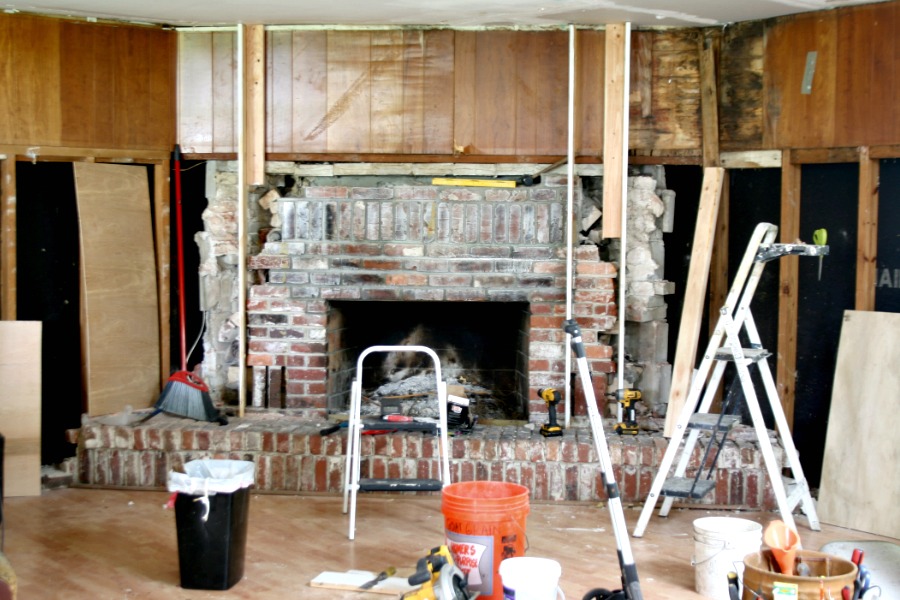 When I started to chip away at the brick I quickly realized it would be nearly impossible to get a straight square corner on the brick. I would’ve had to remove a brick without disturbing the brick above or below, cut it on a wet saw, and reinstall it between the two bricks…holy shizzle…too much work and time for me.
 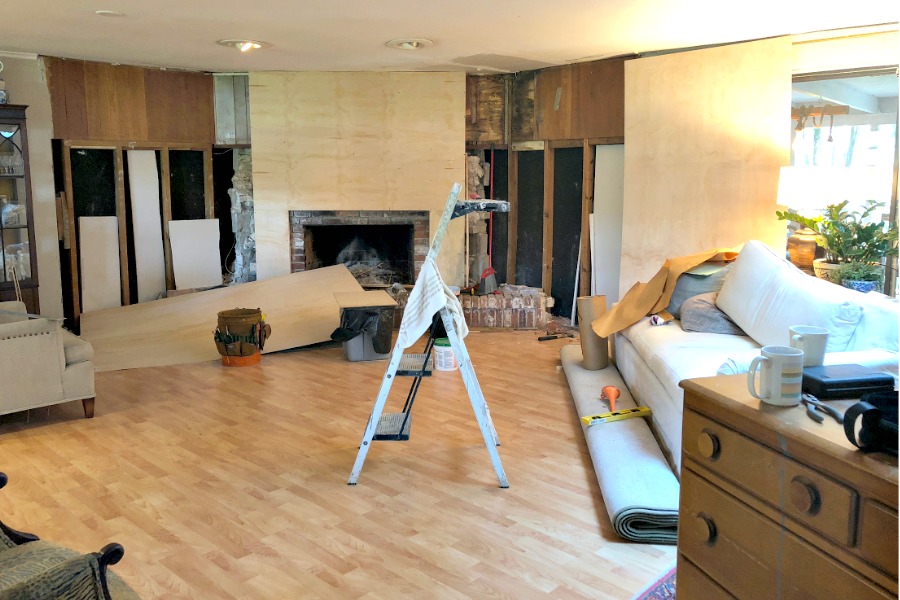 So…I decided to cover it all up again. This time with underlayment. As you can see from the pictures, I took the brick off the side walls of the fireplace to make the walls flat and on the same plain as the rest of the walls in the living room. Just the very center around the fire box sticks out farther than the side walls.
 I then applied a very simple mantle piece around the firebox using lattice moulding, crown moulding and picture rail.
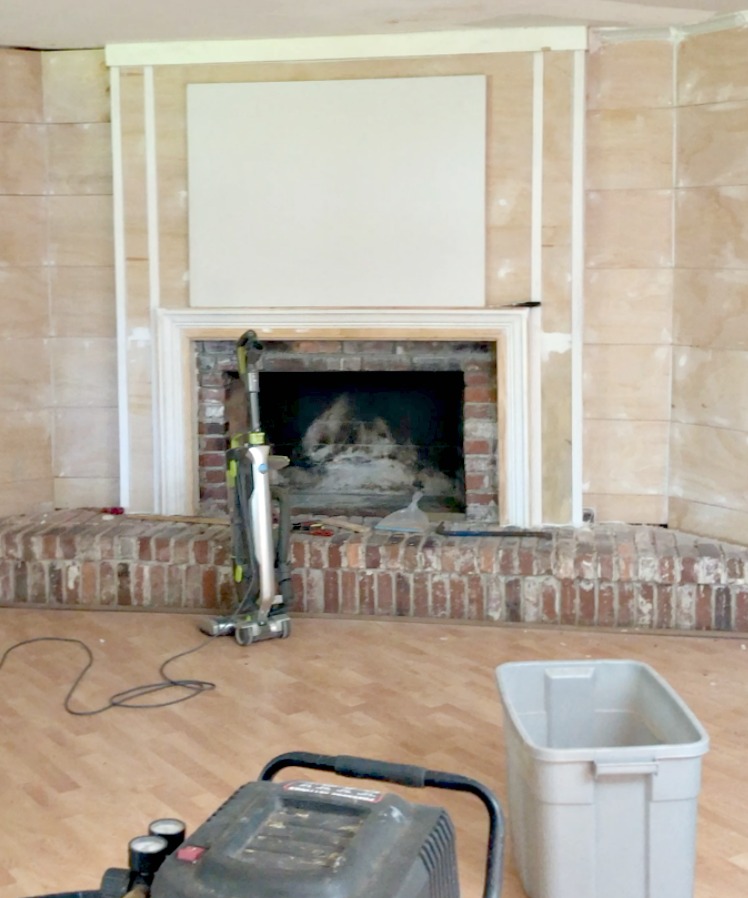
Next I applied 12″ wide faux shiplap, cut from flooring underlayment sold at Home Depot for $13.98 for a 4’x8′ sheet. It’s very affordable.
Sidenote: Notice how spur of the moment I decided to tackle this project…I didn’t even clean out the ashes until the point of putting it all back together. Sometimes you just need a complete change of pace.
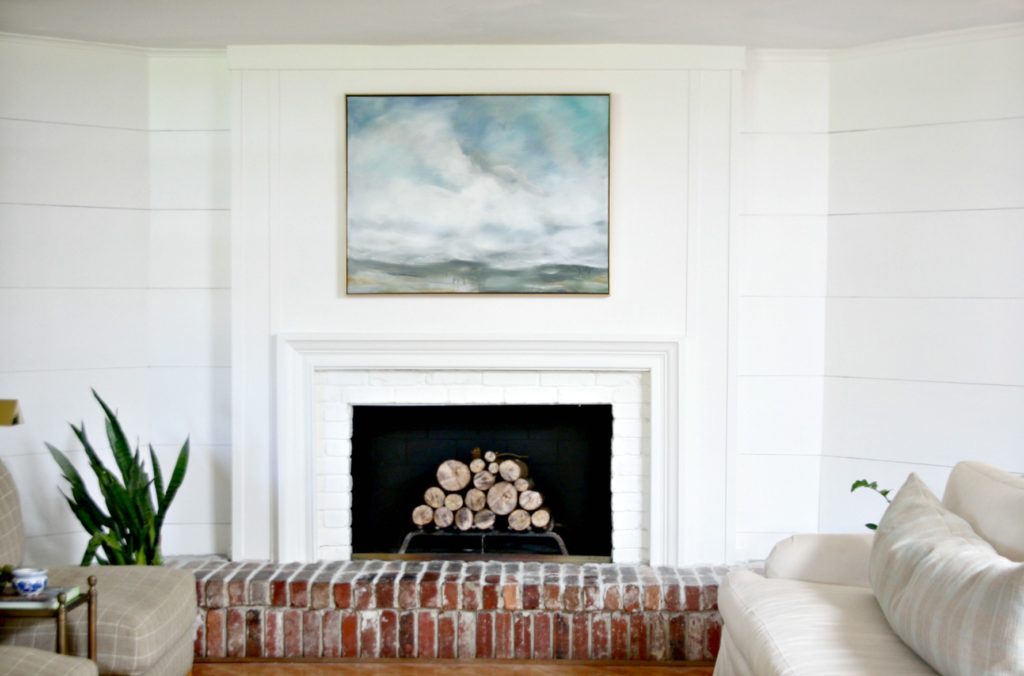
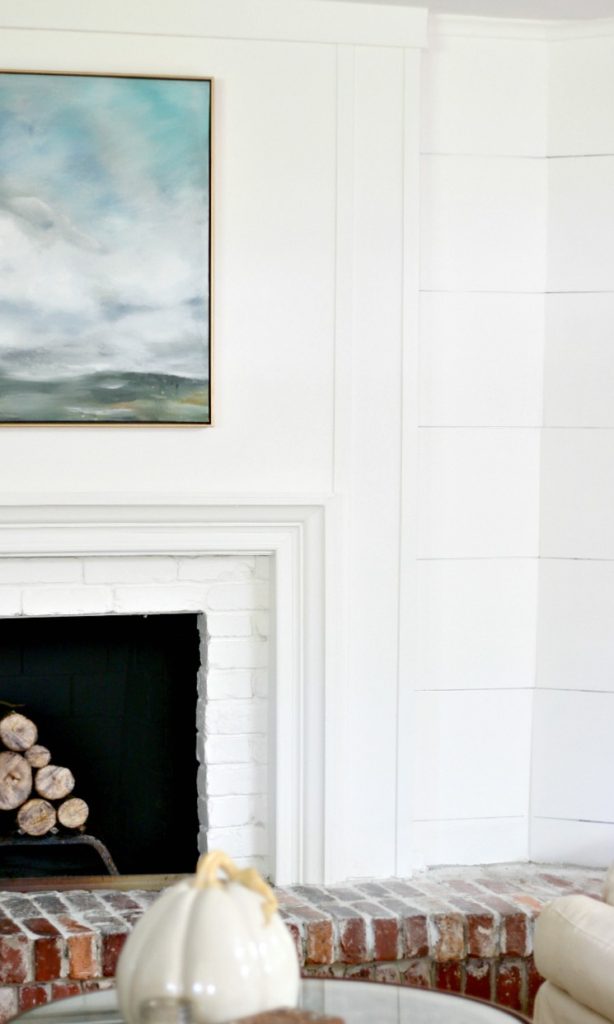
I was waffling for a long time about the shiplap treatment. And finally jumped back on the shiplap wagon again. I was planning to avoid the whole horizontal lines of shiplap on this iteration of my fireplace reface, but shiplap is such an easy, fast, and inexpensive way to finish the walls. If I had re-drywalled, I would’ve had to take off all the paneling on two whole walls of my house, plus re-install the drywall, which is way heavier than shiplap plus the hassle of mudding, waiting for it to dry, sanding, more mud, more dry time, more sanding. You get the idea…drywall is not easy…it’s an artform actually, and I prefer to leave that to a professional if at all possible. This is the finished fireplace, minus a pair of sconces on either side of the art. I painted the brick around the mantle piece and painted the inside of the fireplace with heat resistant black paint to clean up the look.
Initially I thought I would paint the hearth brick white to match the walls, but when I finsished painting the walls and the brick around the firebox, I realized the brick should remain unpainted. It would’ve been too much white.
 The pair of sconces will go on either side of the art in between the two strips of lattice moulding eventually. I just need to decide what type of sconces to use. I’ll most likely go with something pretty traditional and almost certainly brass. Probably like this.
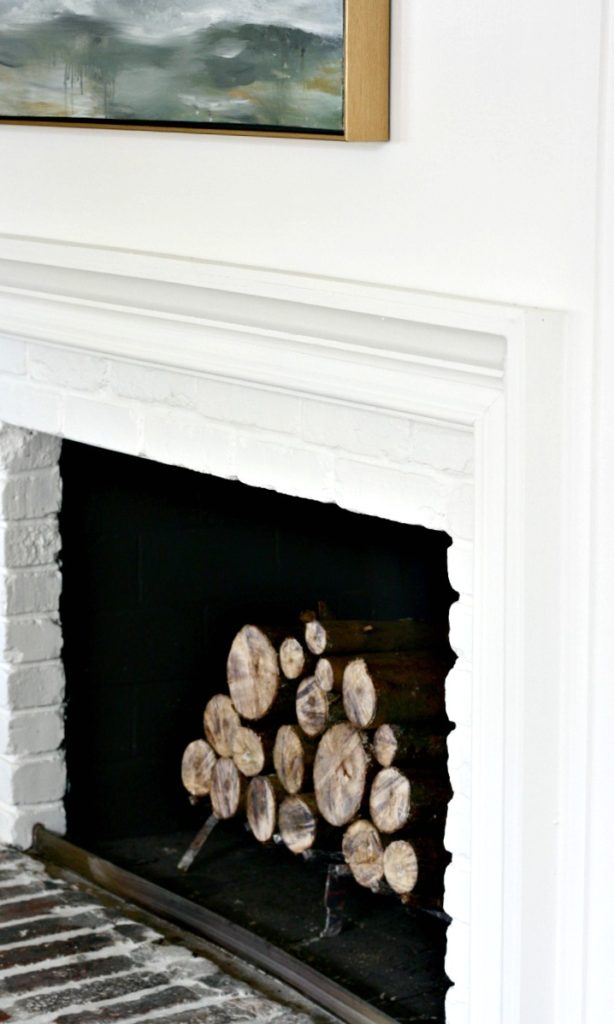 A close up of the moulding around the firebox. It’s narrow, only 2.5 inches deep. Now I don’t ever have to think about what to put on the mantle. I love that because I’m not a great stylist and prefer minimal decor.

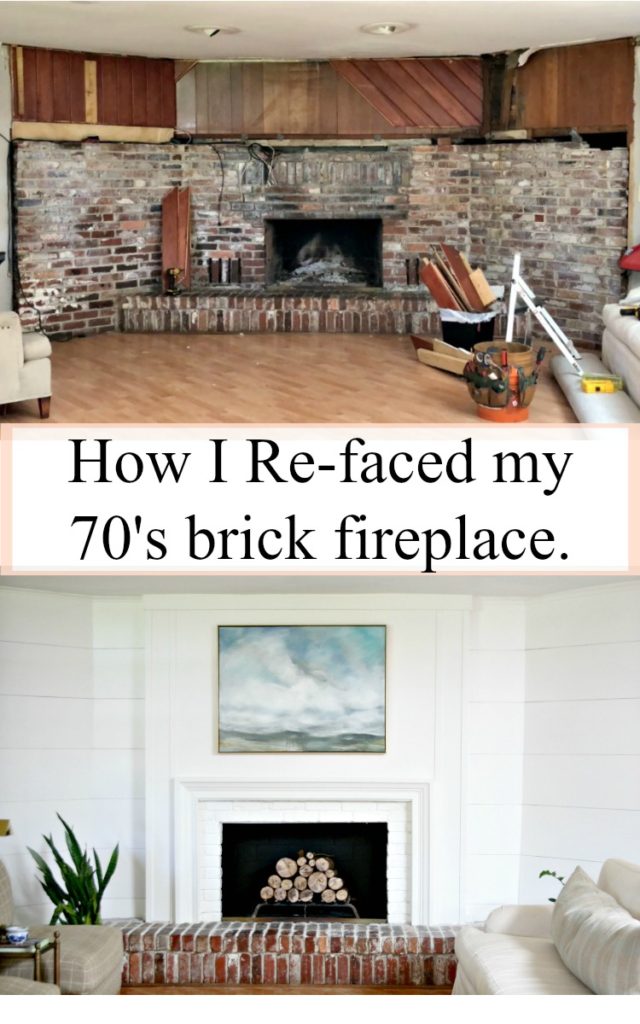 One final before and after of this brick fireplace refacing. What do you think? I’m pretty thrilled with how it turned out.
I did a time-lapse video of the process with a couple clips of me talking about the process in the middle and at the end. Check it out…it’s kinda amusing and a little cringe-y.

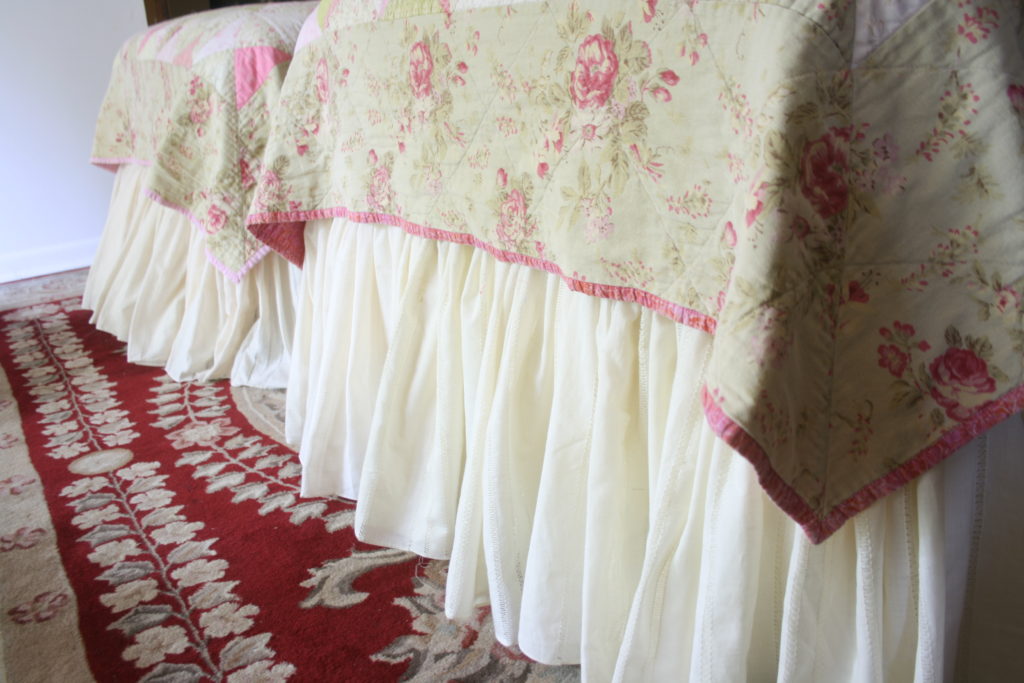
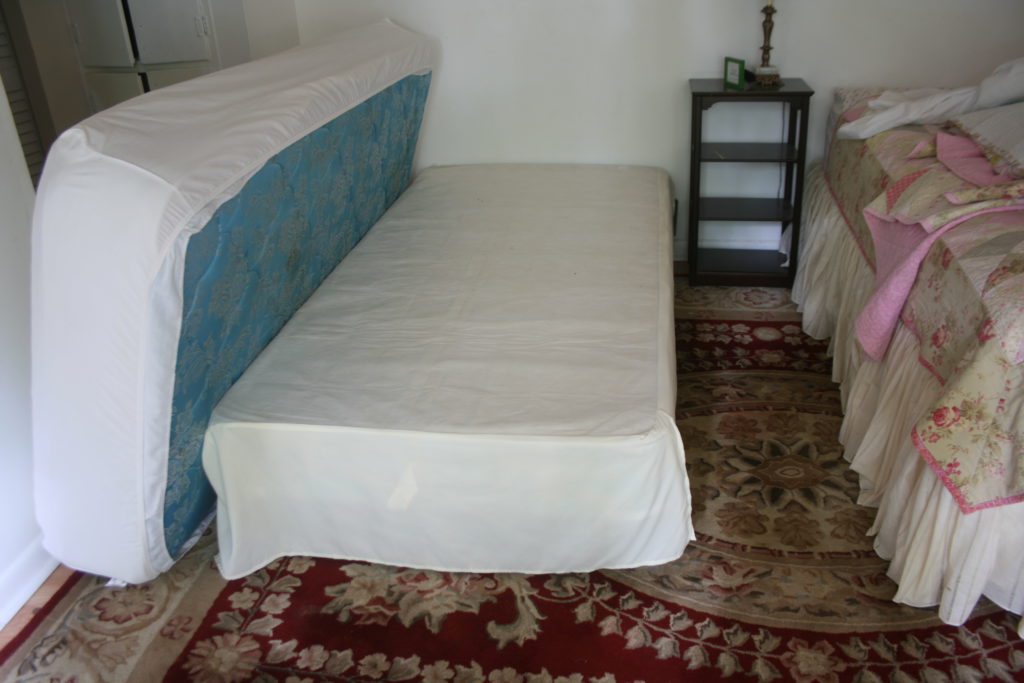 This is what the cheapy Walmart bedskirt looks like before. The platform is white cambric and the skirt is shiny polyester… yum. Less than desirable, but a great base for a really lovely gathered cotton hemstitched skirt.
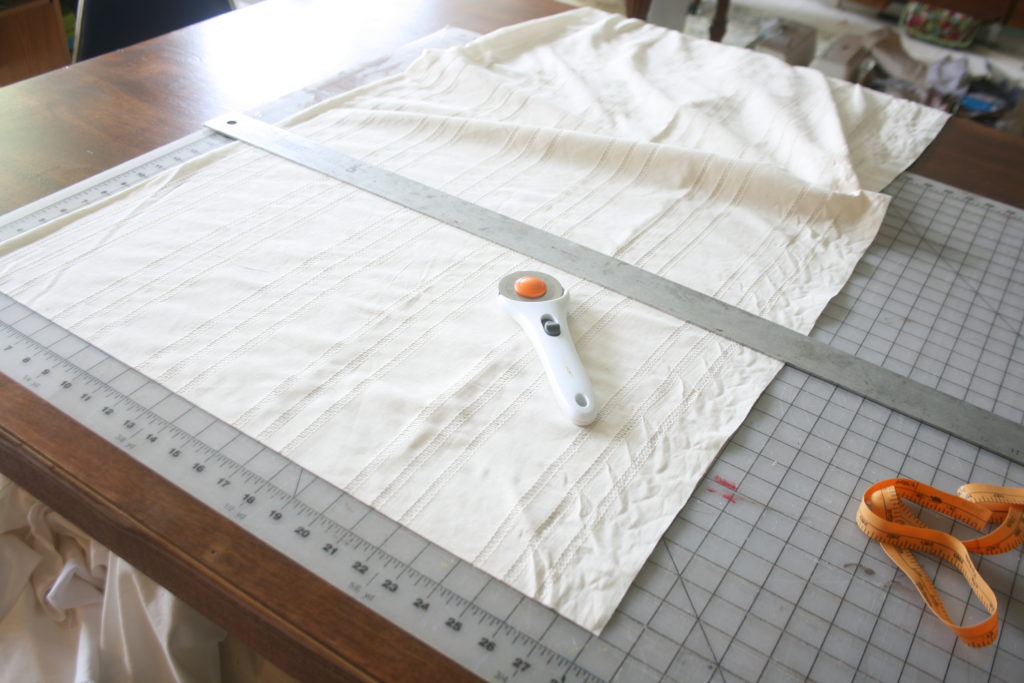 Step 1. I cut 14- 17″ strips of fabric. The drop of the finished skirt needs to be 15″ so that leaves 1″ for a rolled hem and 1″ for the seam at the platform.
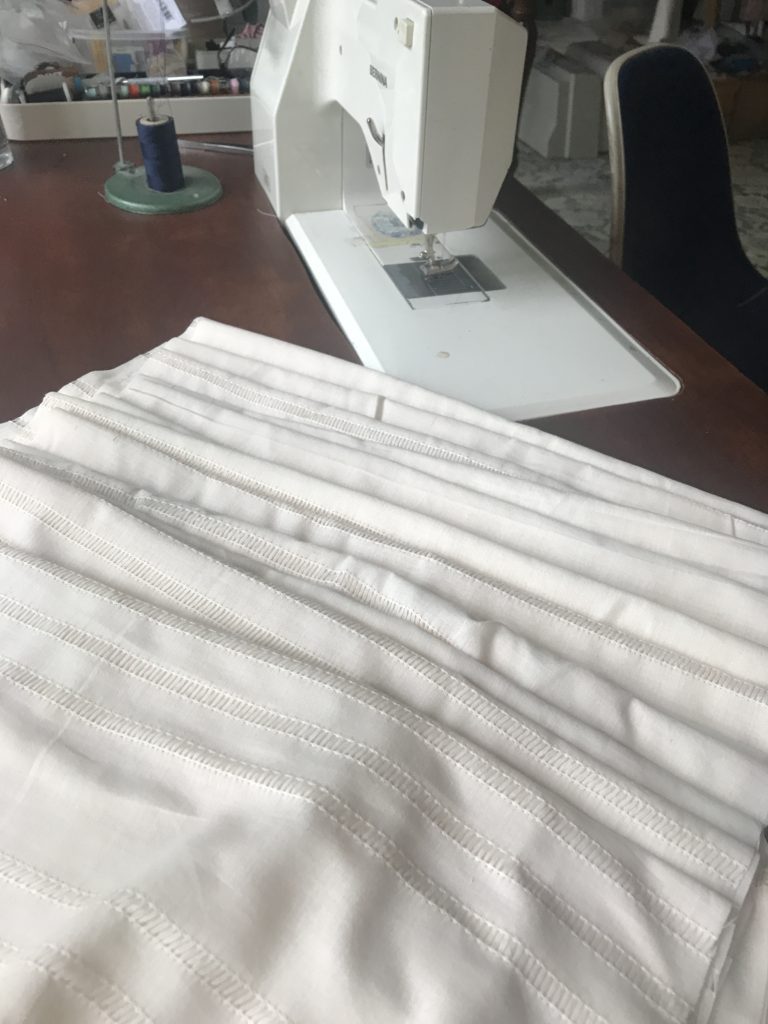 2. I sew together all 14 of the 17″ strips to make one veeeeeerrry long strip.
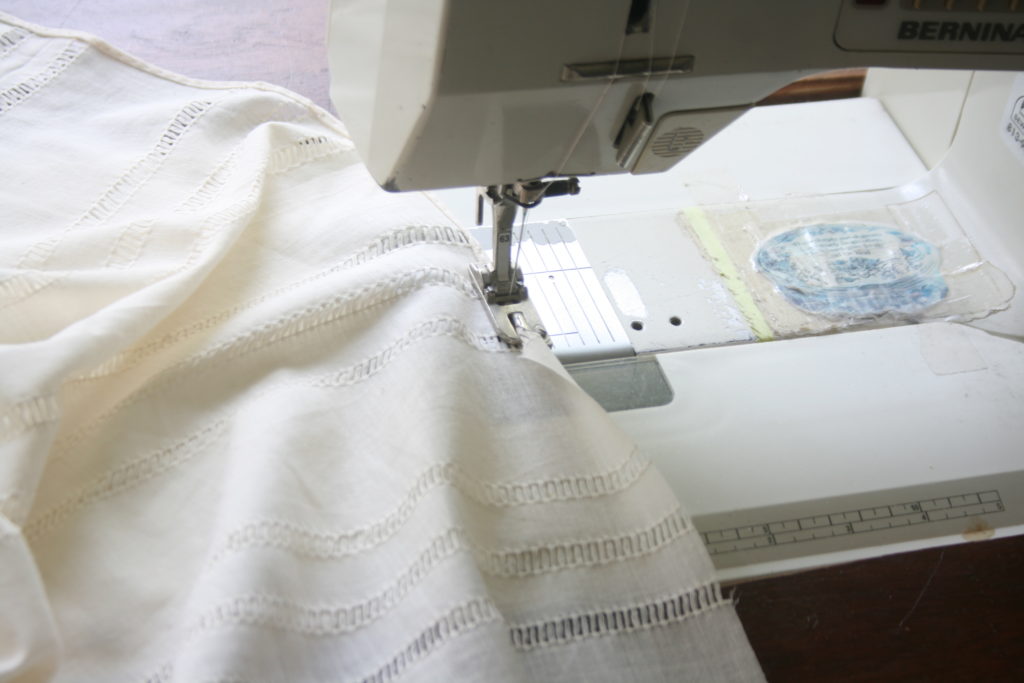 3. Then put in a rolled hem all the way down one side with my rolled hem foot. The rolled hem foot works like magic. It makes such a lovely little hem for sheer fabrics.
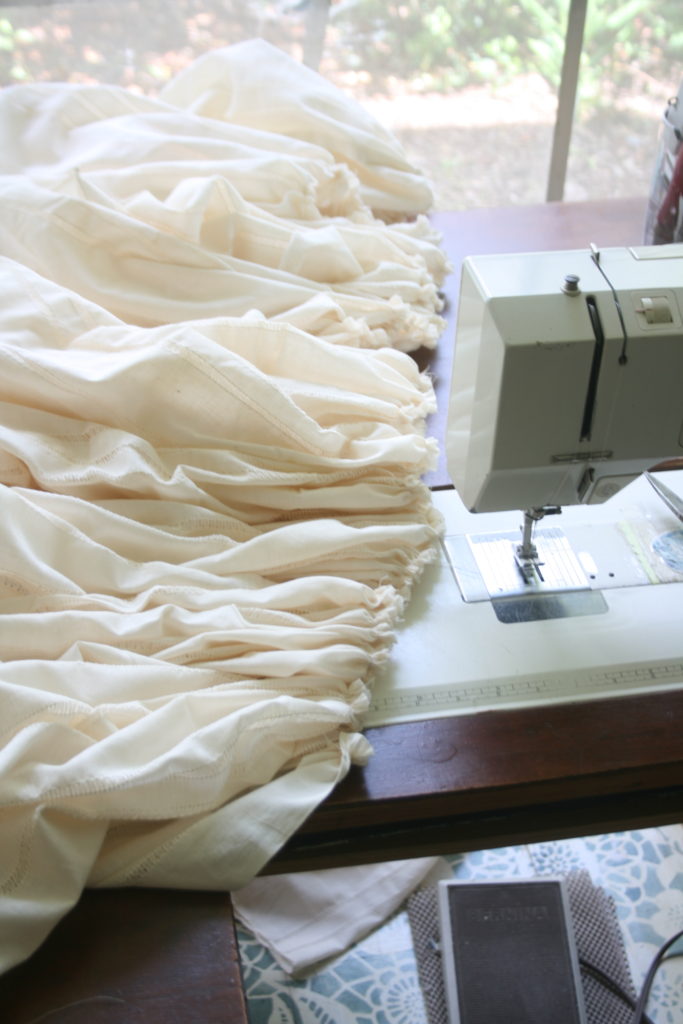 4. After the hem is sewn in, I flip the 17″ strip of fabric over to create the gathers/ruffles.
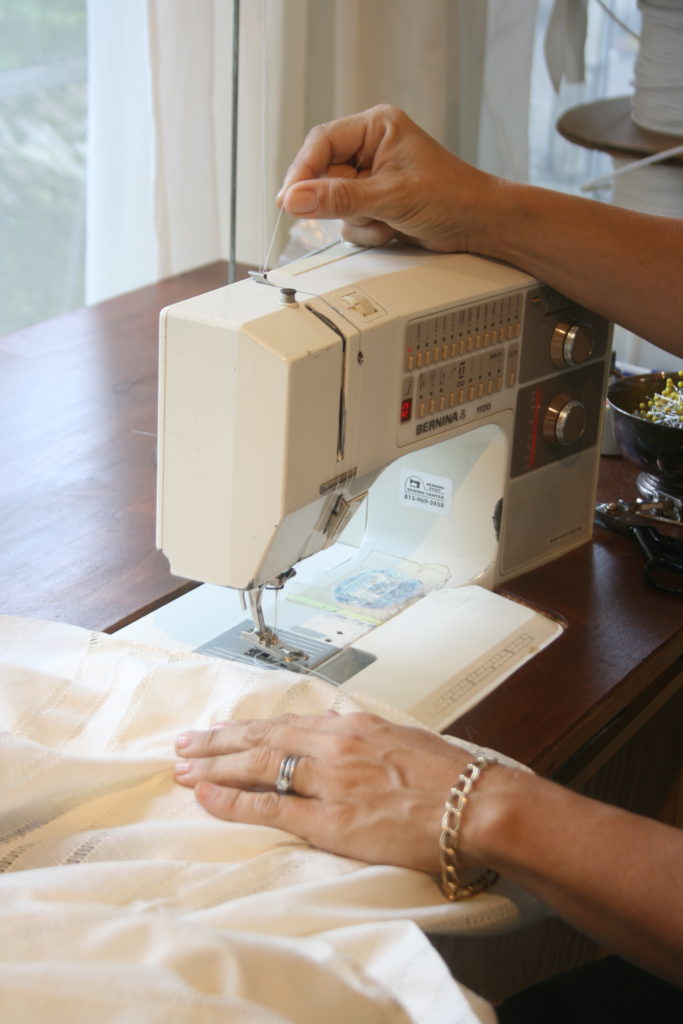 The absolute easiest way to ruffle or gather fabric of this length, is to hold the thread when it comes off the spool to create tension. It immediately gathers the fabric as it comes out of the machine. It does the same thing as adjusting the tensioner on the machine, without the fear of forever ruining the tension setting on your machine.
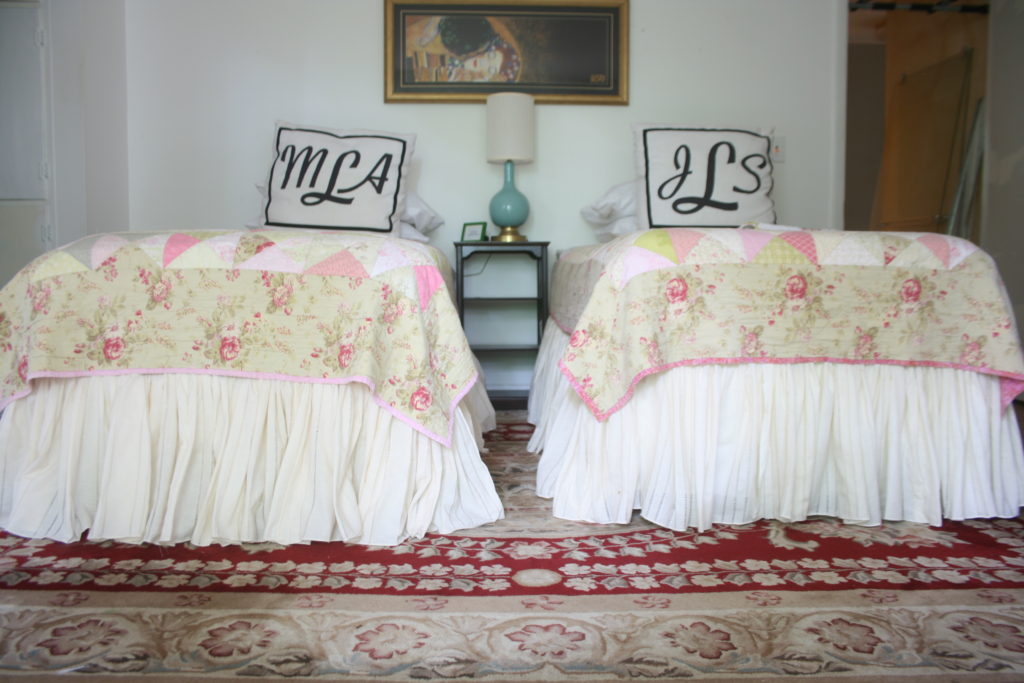 Making a bedskirt is pretty simple although it can be a little tedious due to the amount of fabric and ruffling and hemming required. But, if you just take breaks when you get frustrated it’ll go much smoother. It’s amazing what a difference it makes in the room having these two beautiful extra full bedskirts. It’s night and day.
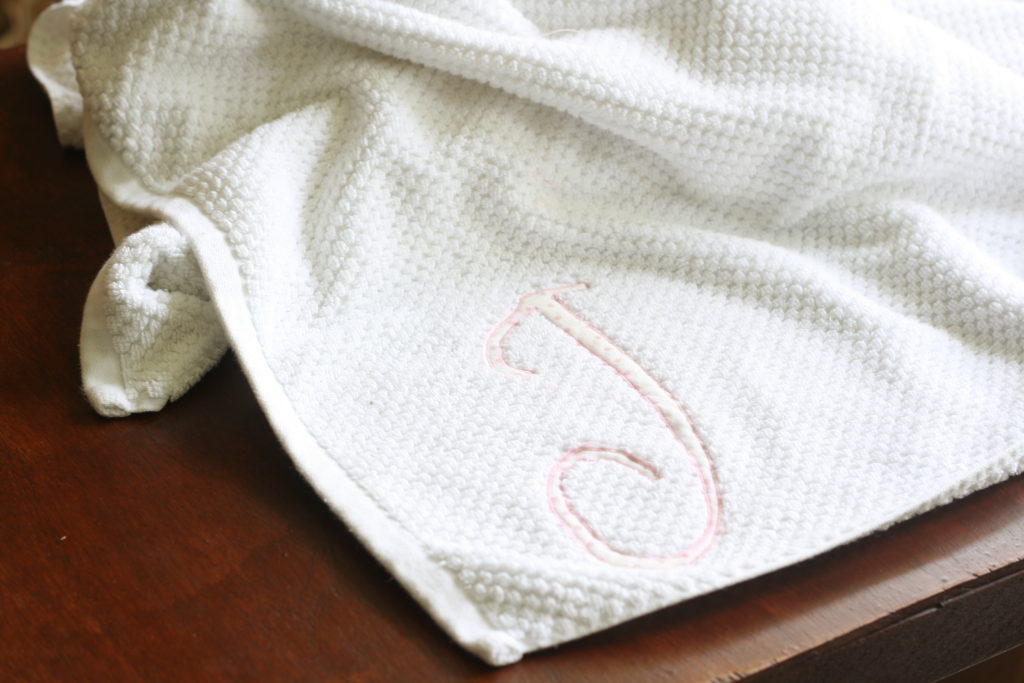
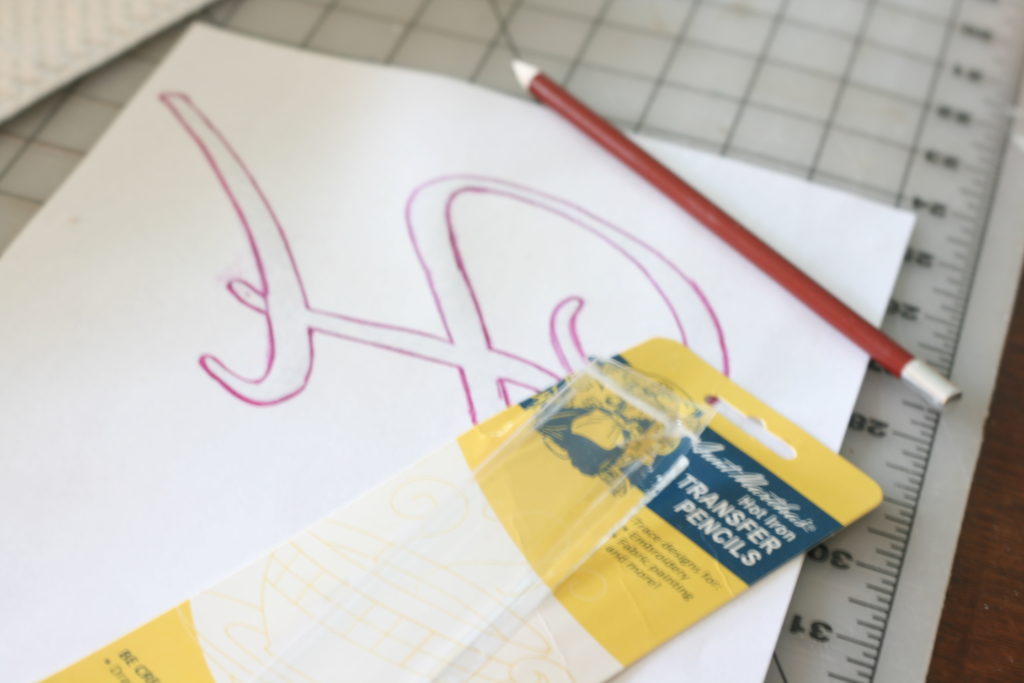 I used the same method I used for the
  Like the method I used for the
 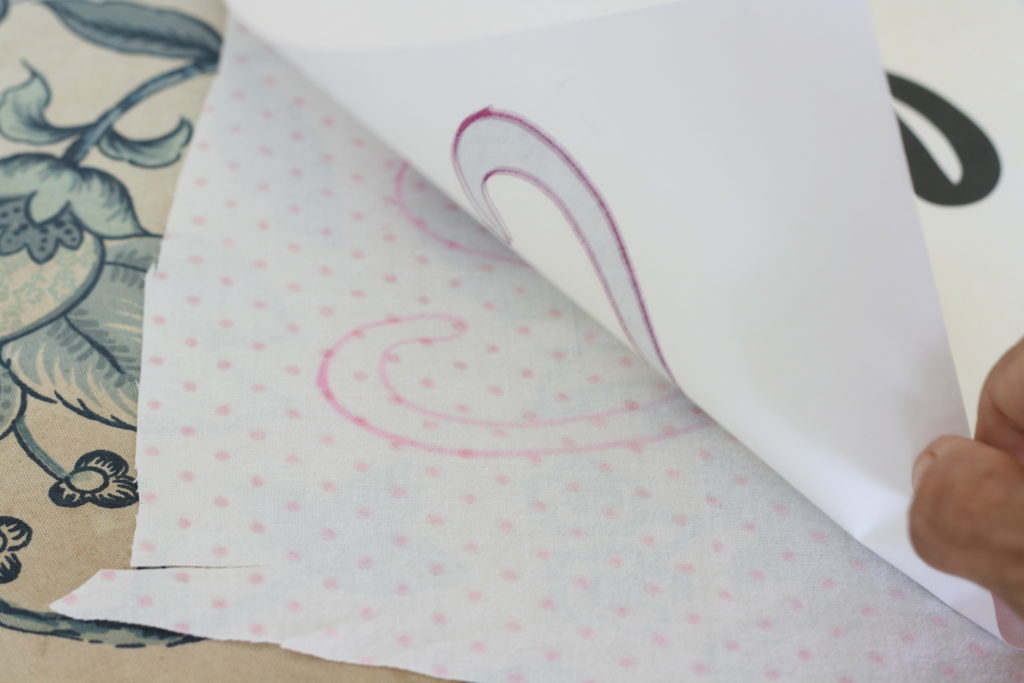 The pencil transferred pink, which is fine for my project because I used pink thread to satin stitch the letters to the towels, but I imagine it might be an issue for other non-pink projects. I think it should wash out though.
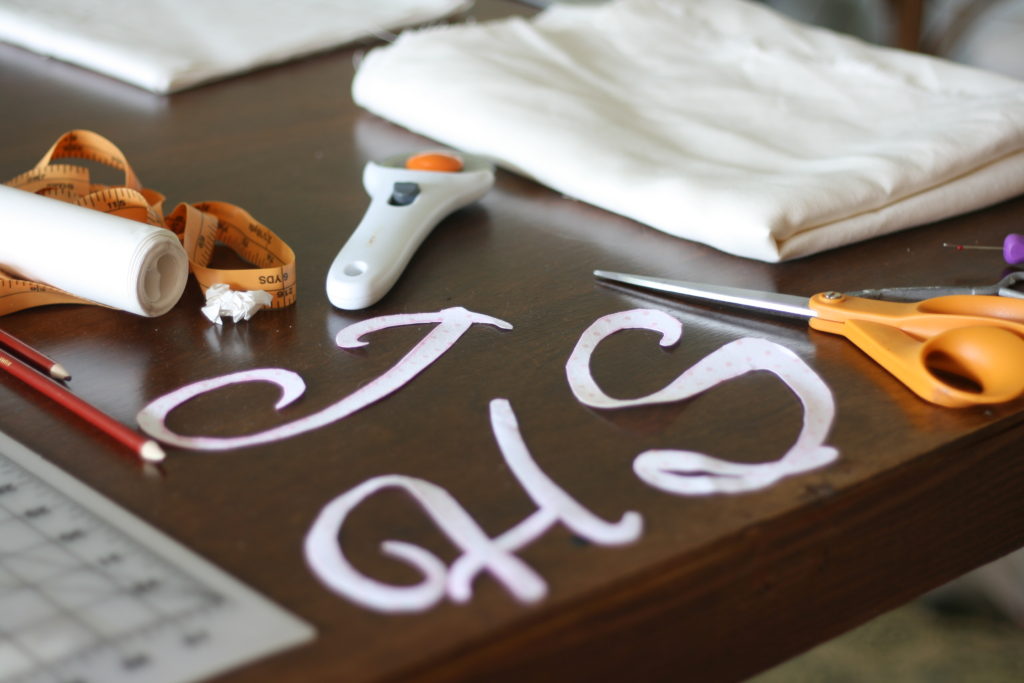
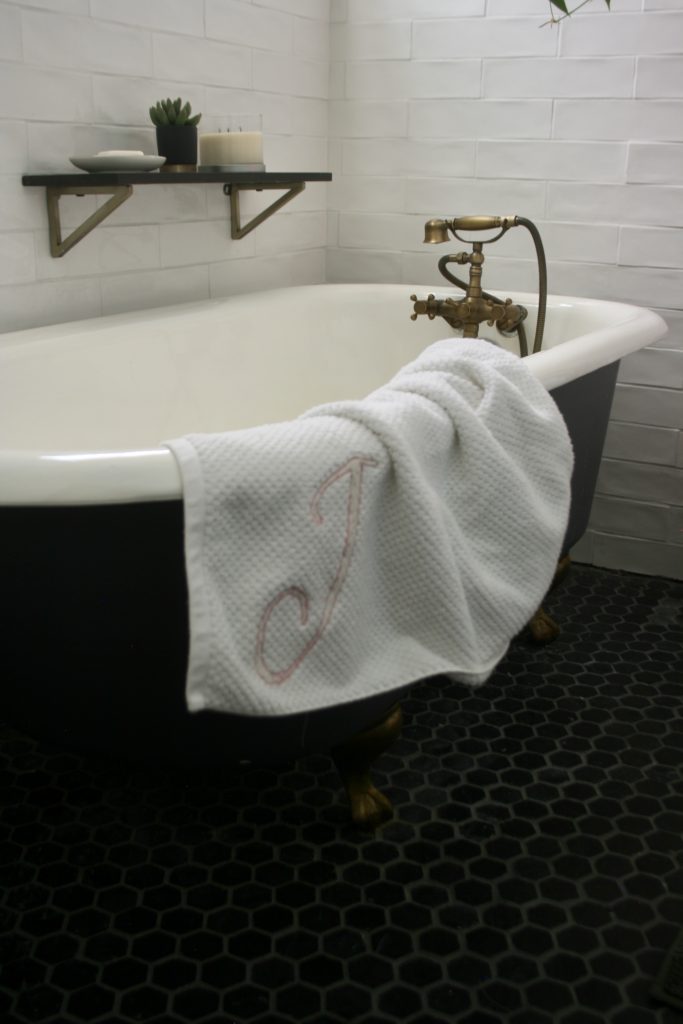 I monogrammed two towels per child, so we’ll see if this actually helps with my endless laundry piles. The kids all seem very receptive to the idea, even a little excited. Now I need to hang a hook in each bedroom so the towels have a home between showers.
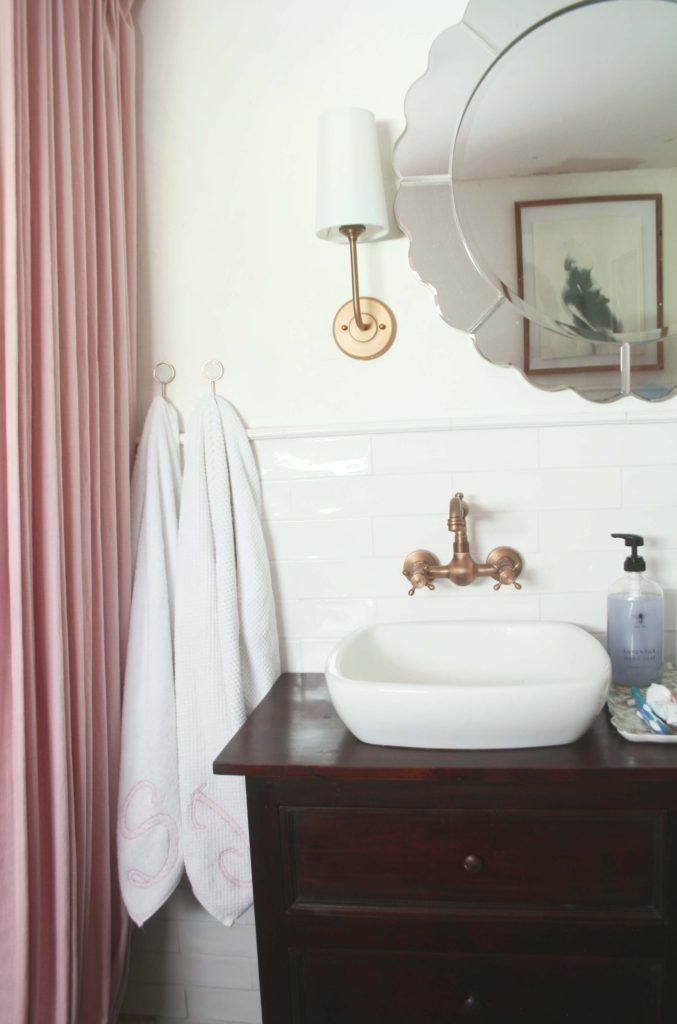
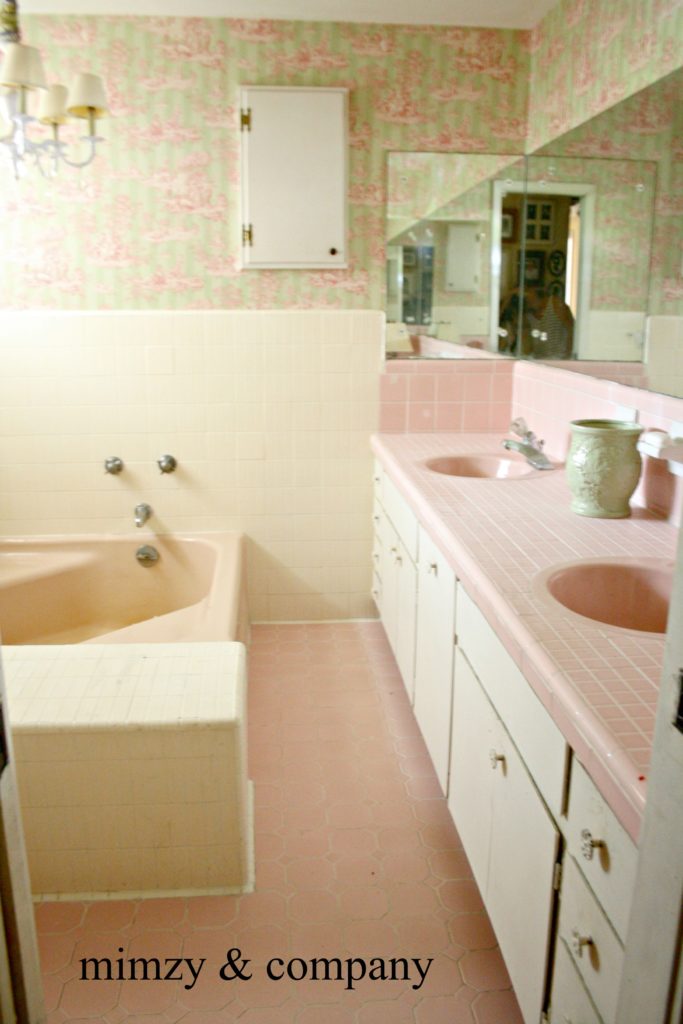
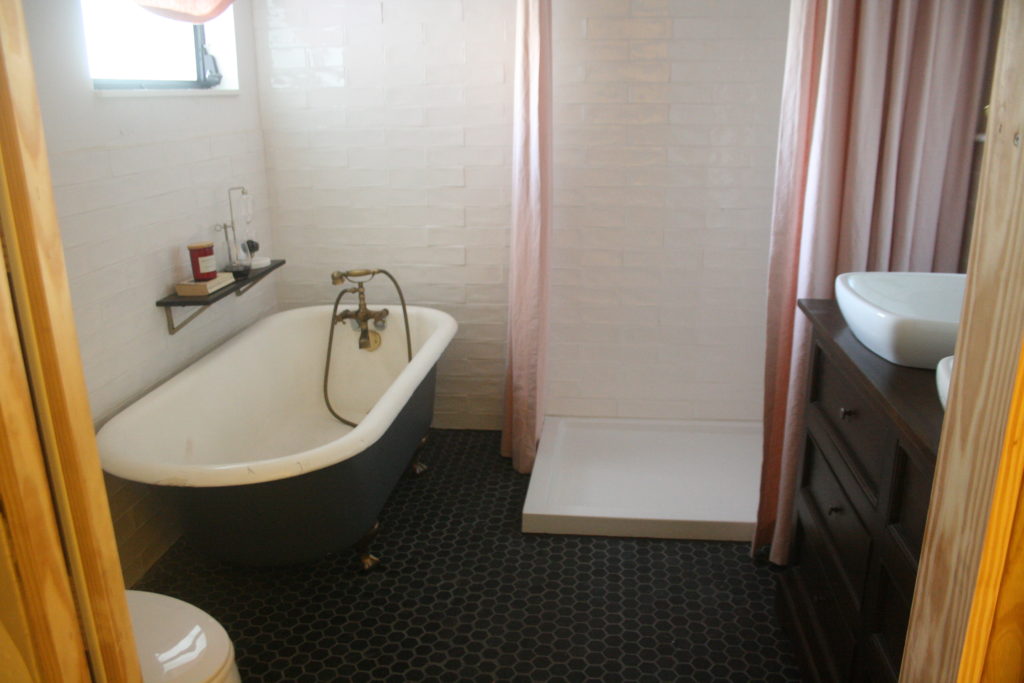
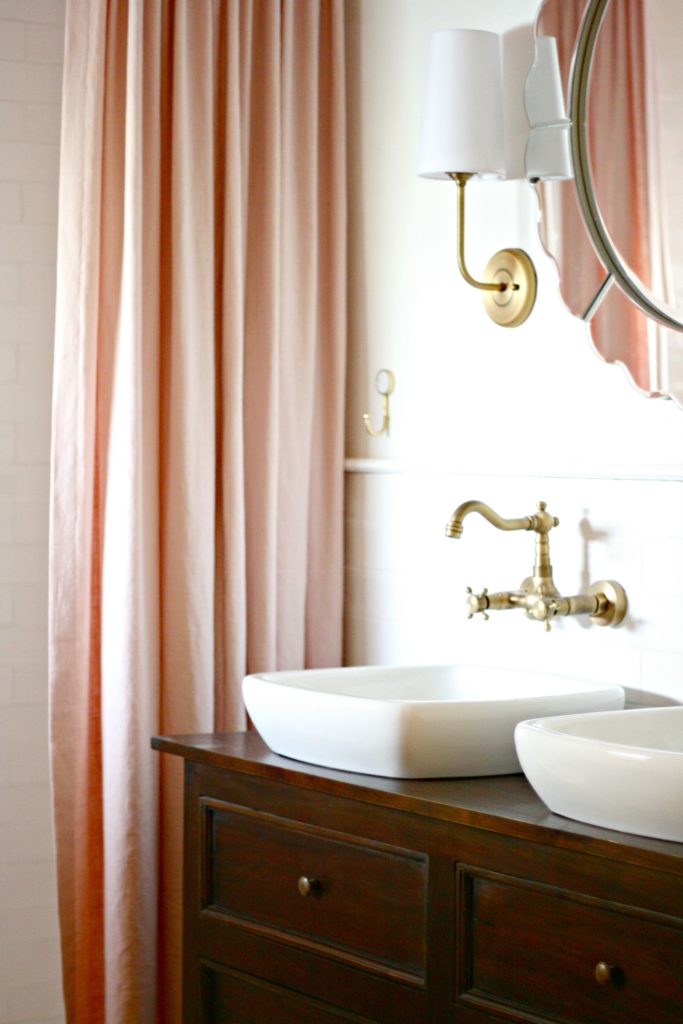 This vanity is a huge improvement over the disintegrating vanity that once lined this wall. It’s actually a dresser and all the drawers are useable thanks to a very kind and considerate plumber who fit the pipes between the drawers. Thanks Glen!
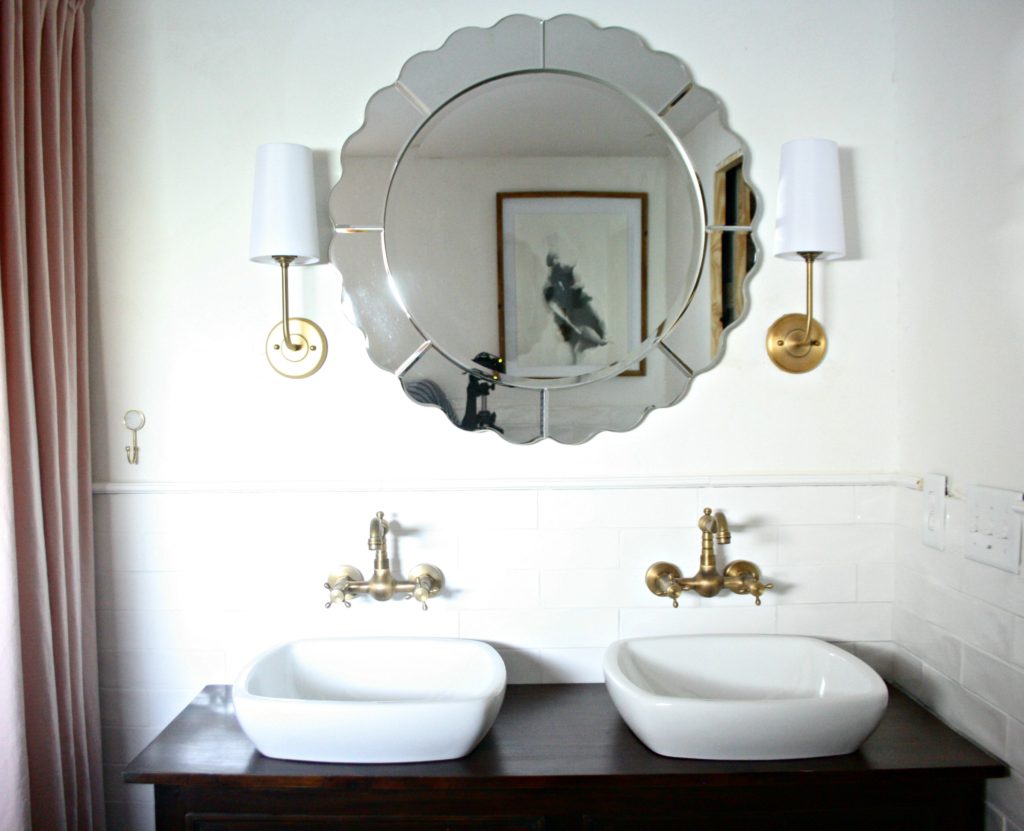 I’d like to have a piece of stone cut for the top of the vanity at some point. The faucets and the lights came from amazon
 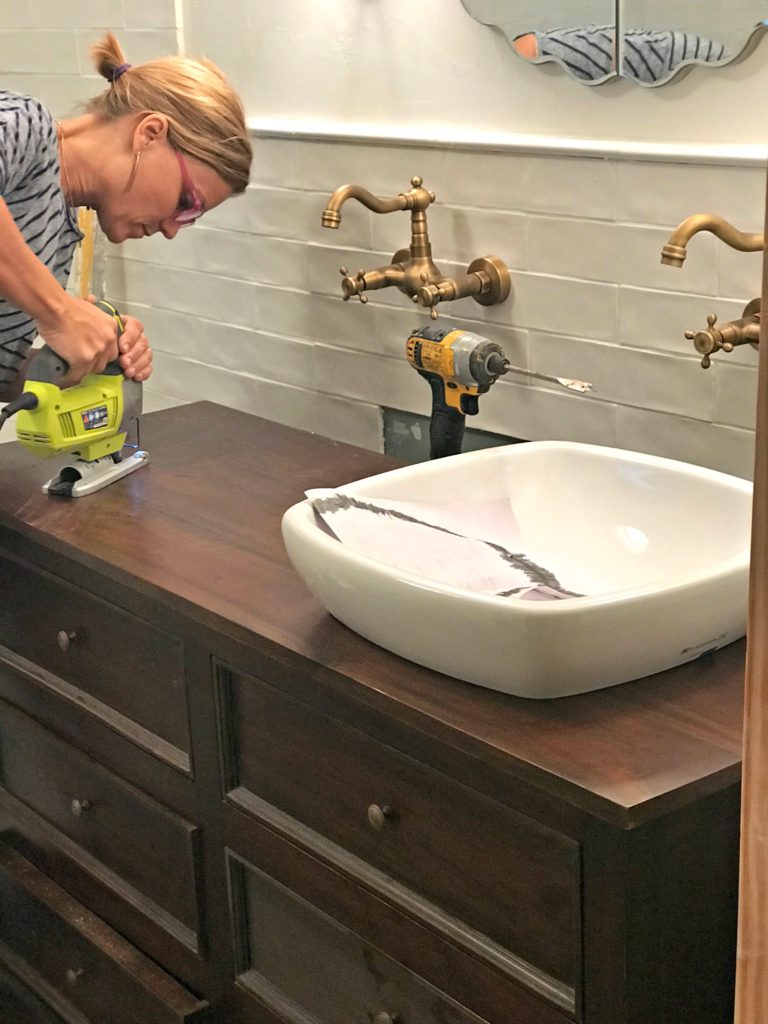 This was at about 6am this morning. Nothing like a deadline to get things done.
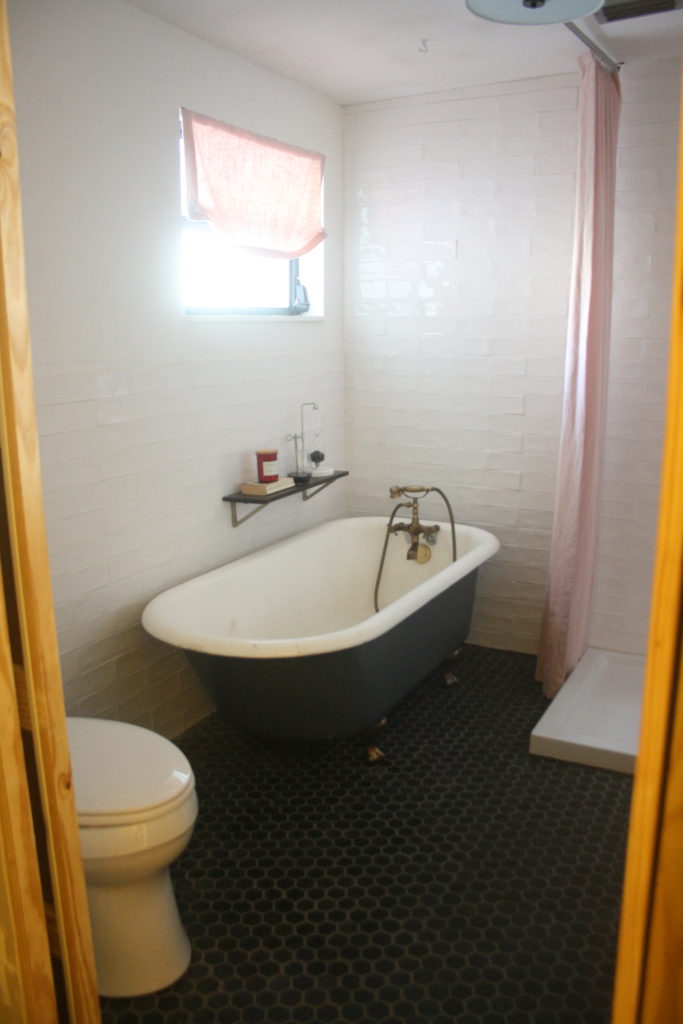
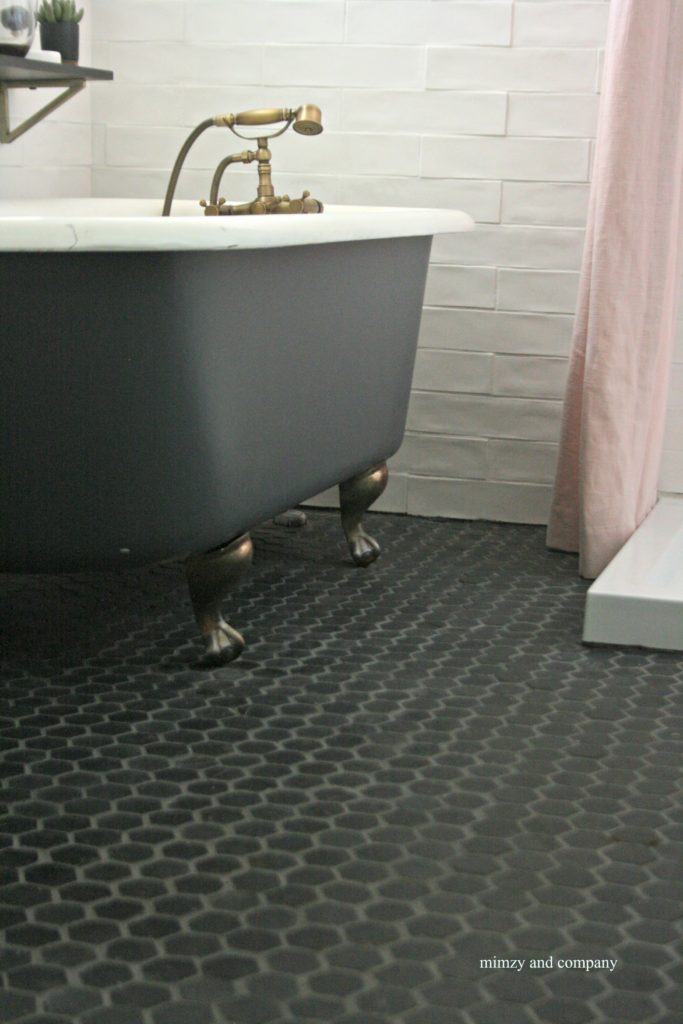 I’m not sure about the color of the outside of the tub, it may change at some point.
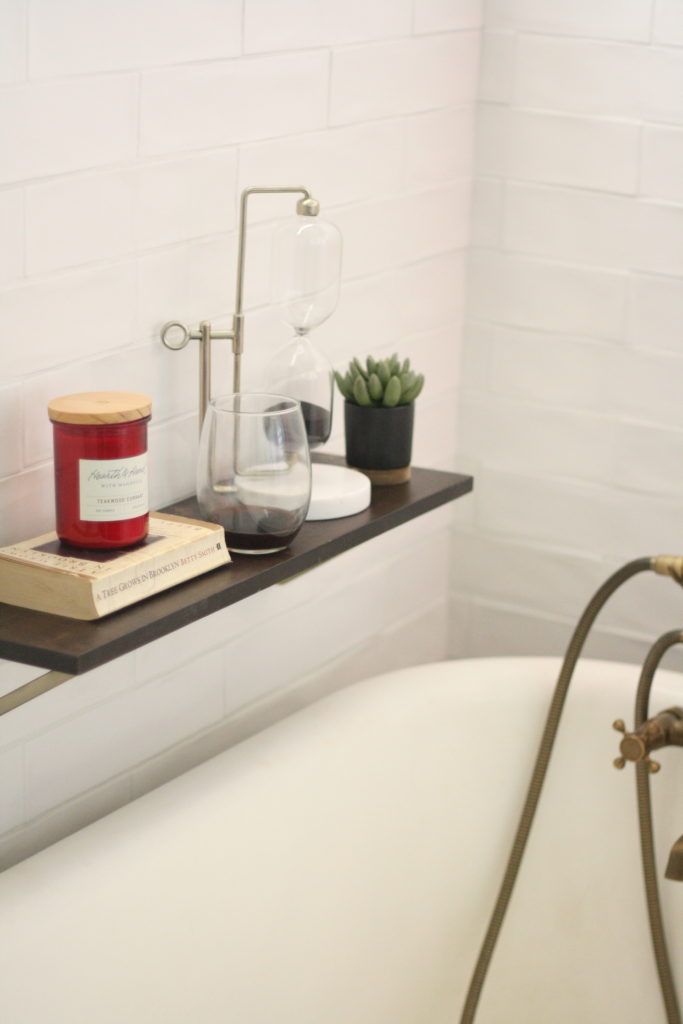
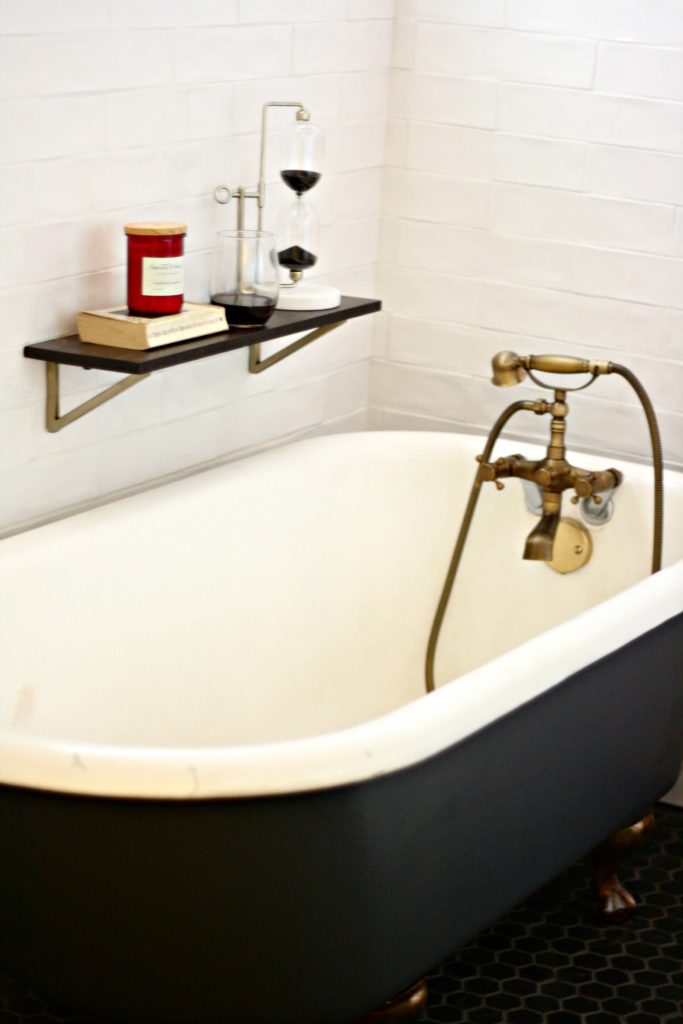 My bathtub still needs to be refinished on the inside. It’ll be an easy task, I just ran out of time. Also, you’ll notice the fittings that connect the faucet to the water lines are not brass like the faucet. They allow a wider faucet to be connected to narrow holes in the tub. Well , brass is on back order so that’s still on the to do list.
 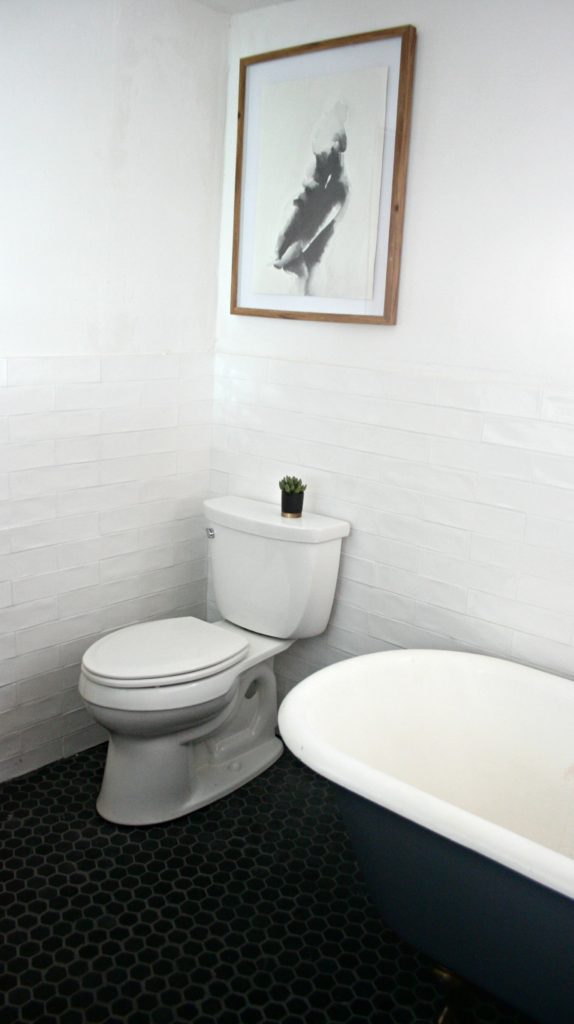 I ordered this piece of art from Minted.com. It’s called Mother Embrace and the artist is Kate Ahn. I absolutely love it and linked it
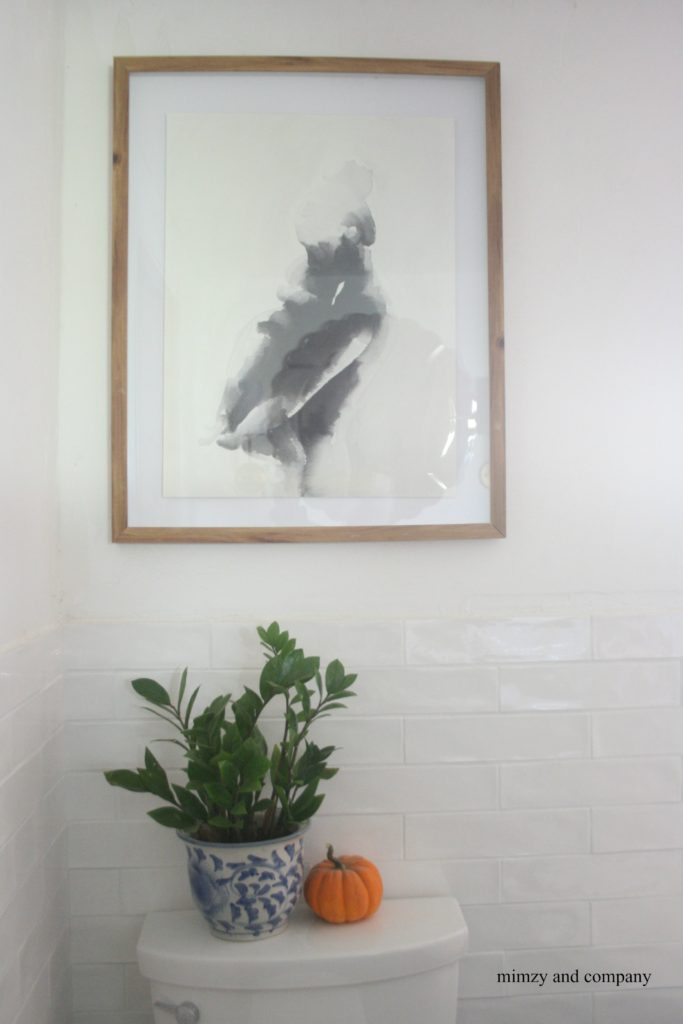
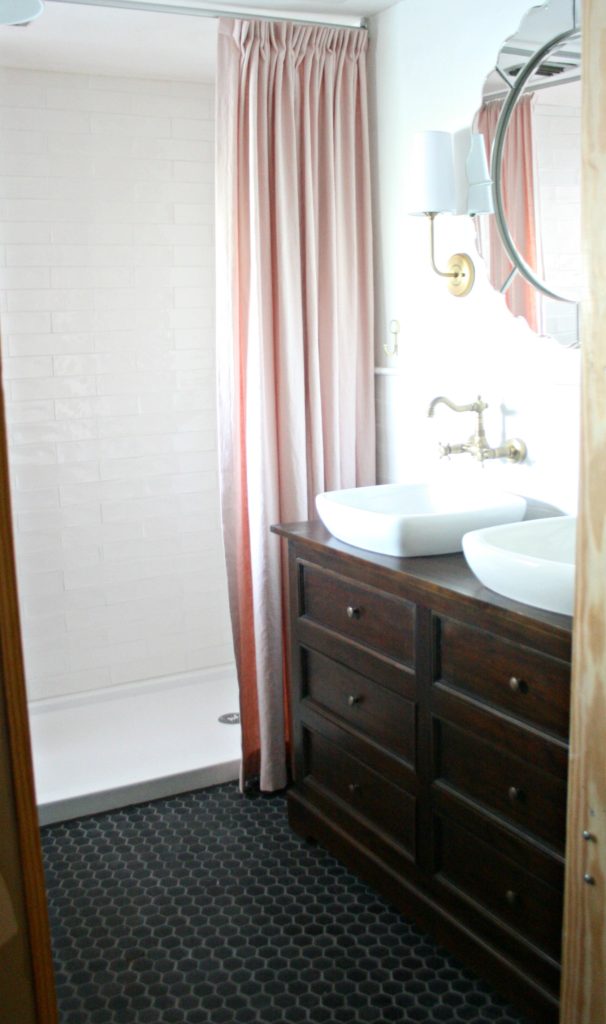 This bathroom is super hard to photograph because it’s only 8′ x 8′ . I widened the pocket door from a 24″ door to a 30″ door. It makes the room feel more spacious.
 Now I must clean up the aftermath and prepare for Thanksgiving! Giddy-up!
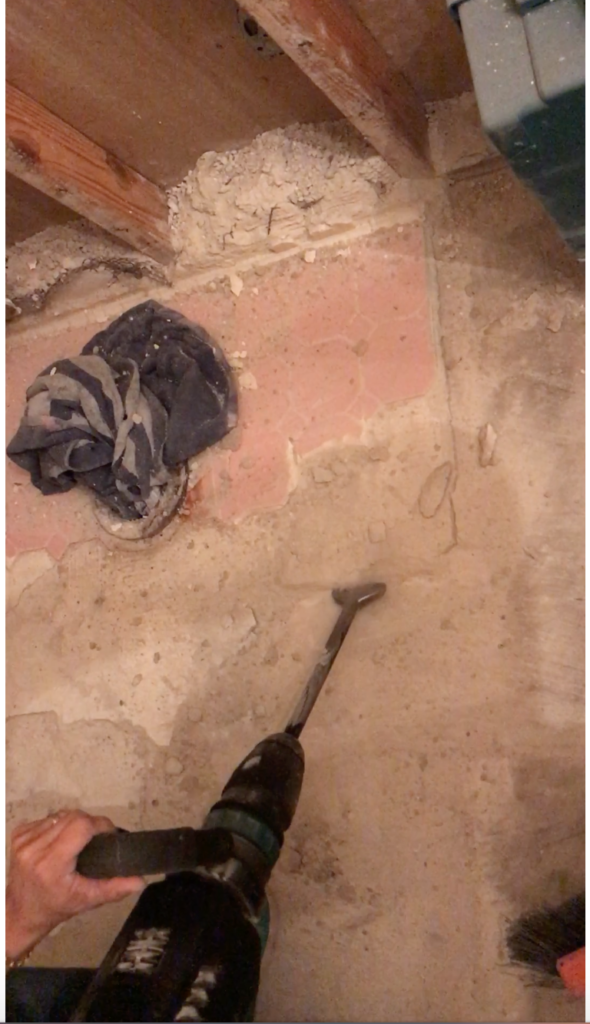
 Jackhammering is not as scary as it sounded. The tool is simple and easy to use. It’s just a little heavy. The tool itself weighs 20 pounds, which is good for straight down jackhammering, like the trench in the picture above because the weight of the tool does all the work. However, when we removed the floor tile, the jackhammer had to be at a 30-45 degree angle to the floor so the weight of the tool was solely resting on arm power. I sat on a Homer bucket and rested the tool on my leg for most of the tile removal. This method saved my back and arms from exhaustion.
 The plumber was scheduled Monday so we had to have everything prepped and ready for him to put in the new pipes and install the new water lines. It was a race to the finish.
 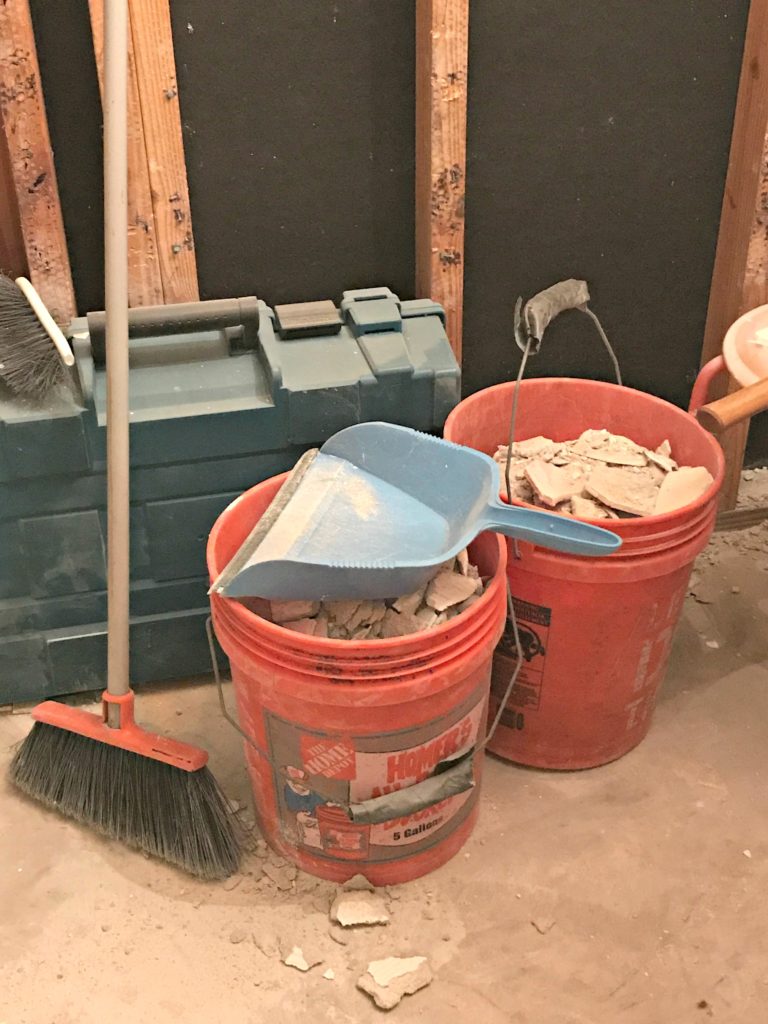 I made two trips to the dump and these Homer buckets made it so much easier to haul all the rubble out of the bathroom. The handles are solid and the buckets hold just enough weight that they’re not too heavy to carry. I absolutely recommend buckets for hauling rubble, and this is not a sponsored post, but the buckets were a sleeper of a tool in this job.
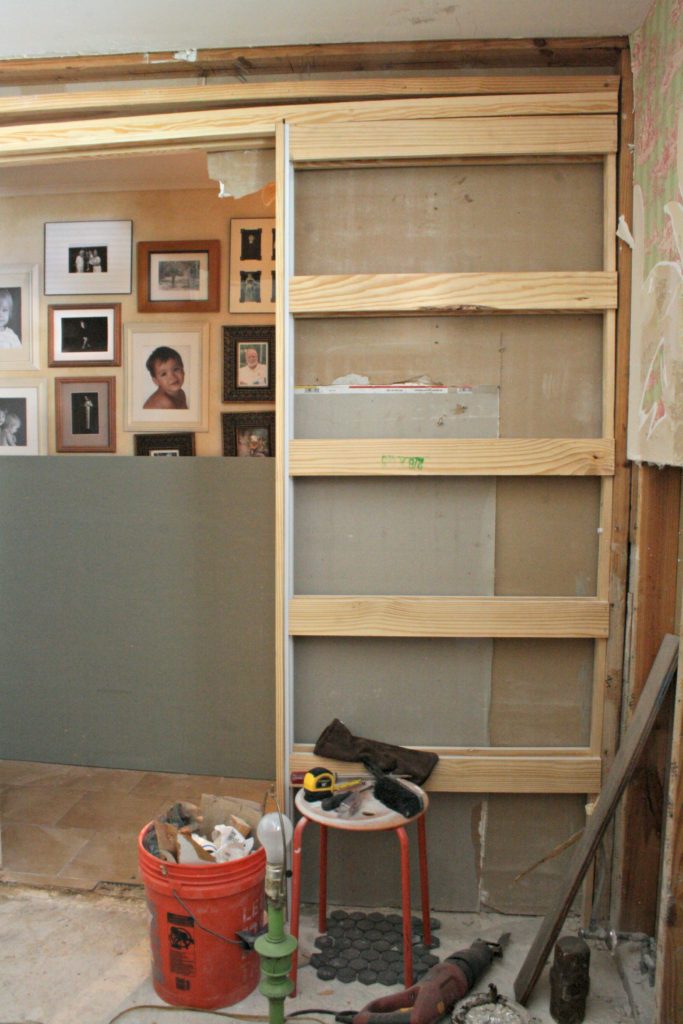 I also took out the old pocket door and installed a new wider pocket door over the weekend. I can’t even remember when that happened except that it was prior to the plumber arriving on Monday. The old door was only 24″ and our clawfoot tub wouldn’t even fit through that door, but that’s not why I widened it. The 24″ door was just odd for a bathroom. It felt like a closet door, almost like you needed to turn sideways to enter the bathroom. It just felt weird.
 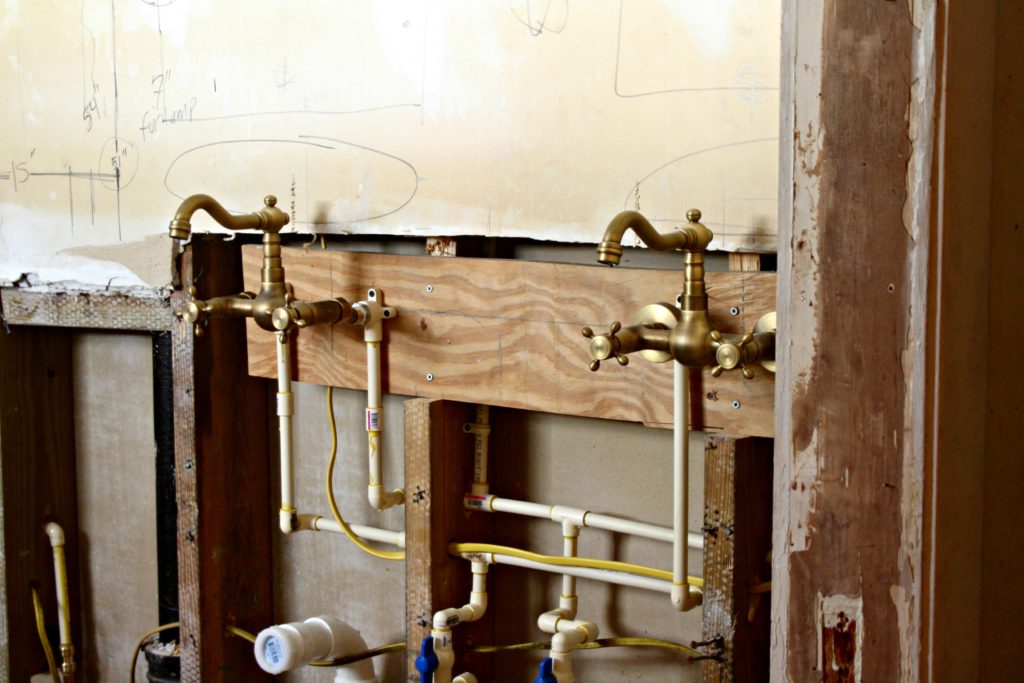 Then the plumber came Monday and installed all at the drain pipes. Tuesday he ran all the water pipes and installed the faucets for the two sinks and the faucets for the shower and the clawfoot bathtub. Yahoo!!! We have working faucets!
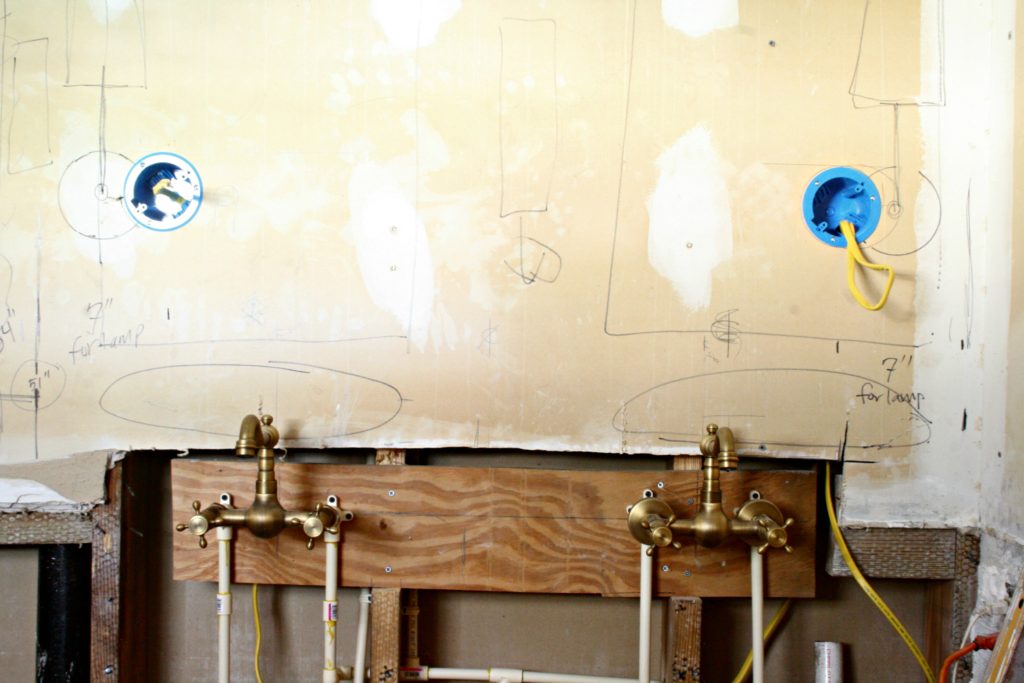 Would ya look at that! I have junction boxes for my sconces, which look a little oddly placed, but I think its the angle of this picture.
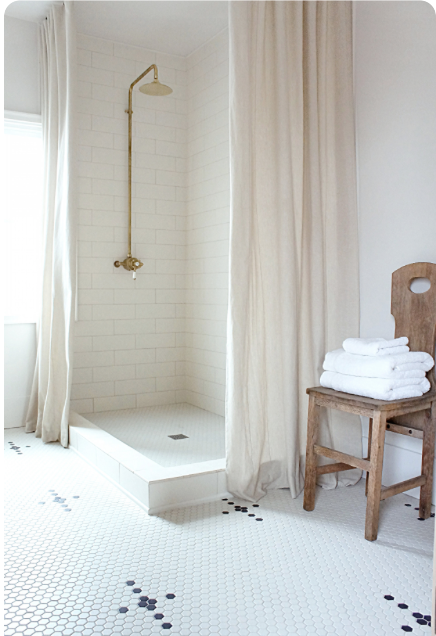
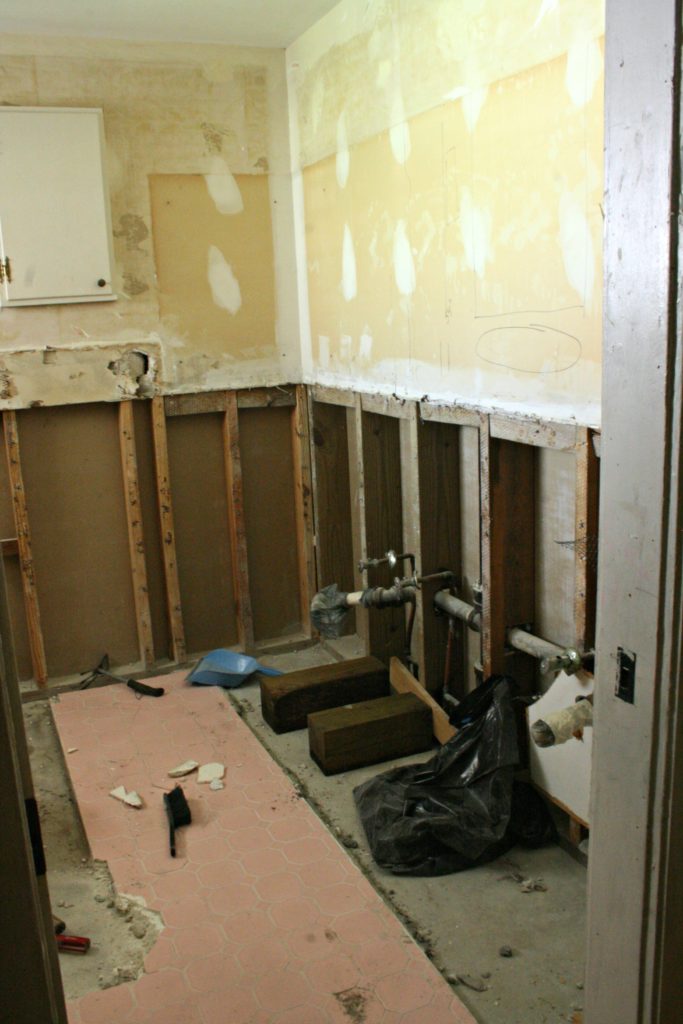 This is where I am today. The only demo left is the floor tile. For which I have to rent a jackhammer because it’s also set in cement, which is two inches thick and stuck like a mutha.
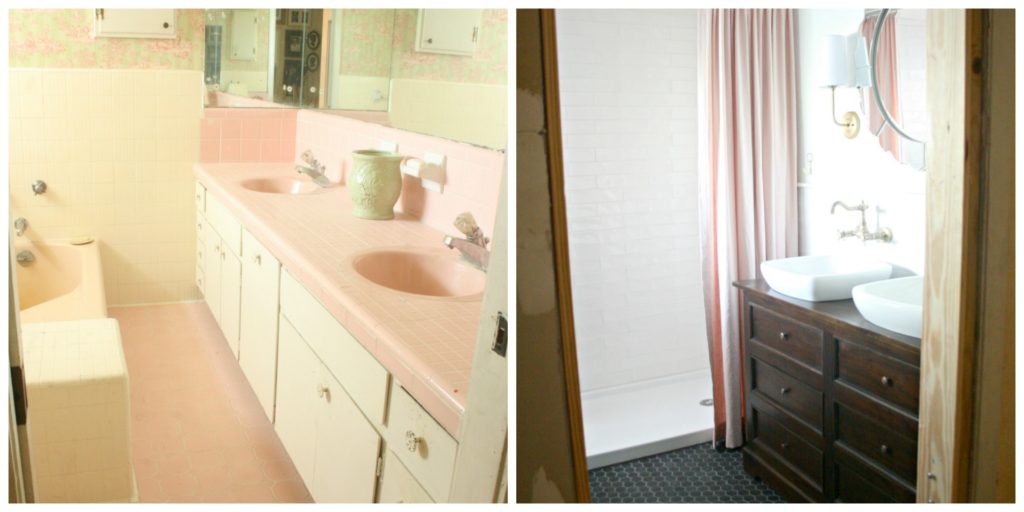
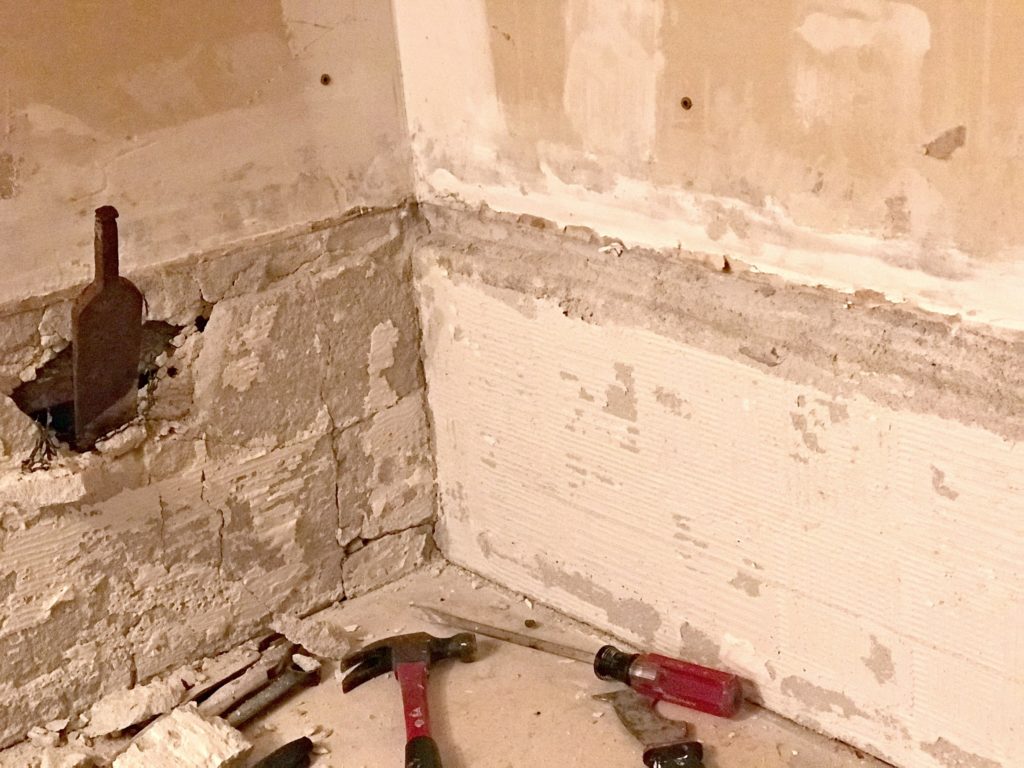 …back to the mudwalls. The pink tile above the vanity came off lickety split. I was so excited. I had visions of installing new tile, painting, and hanging curtains, but that came to a screeching halt when I started on the white wall tiles.
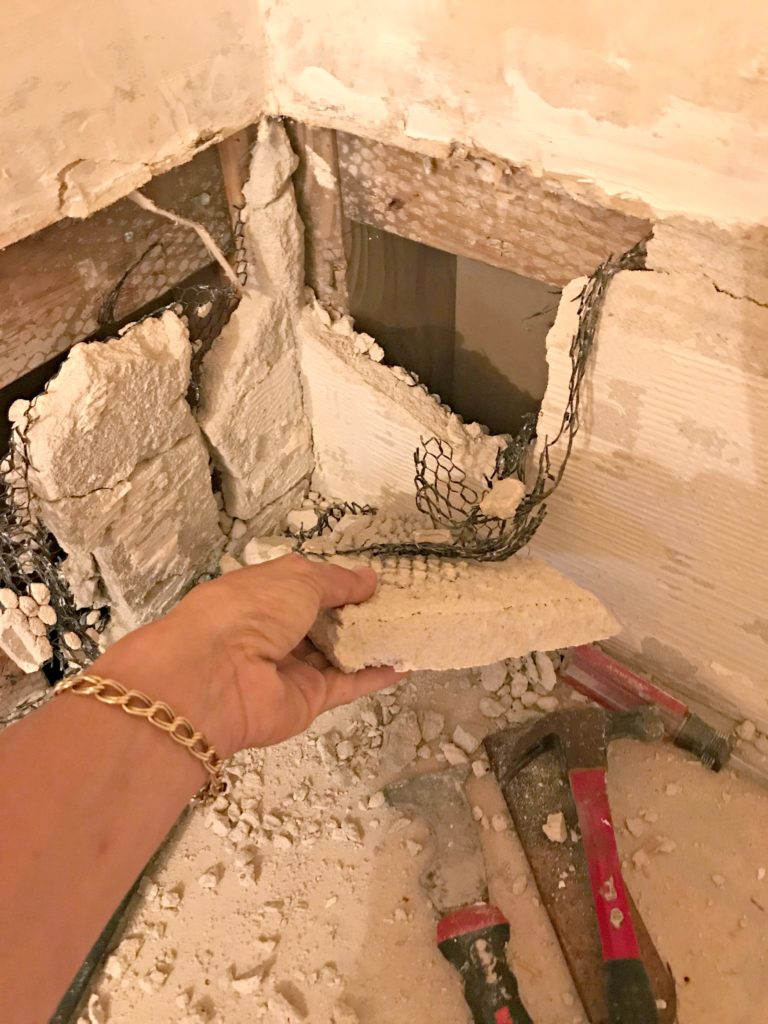 Just look at how thick that stuff is! It took me a solid hour just to loosen up this corner. I was so discouraged I just walked away for a while and watched Youtube to see if there was an easier way. I came across a couple videos that helped a bit.
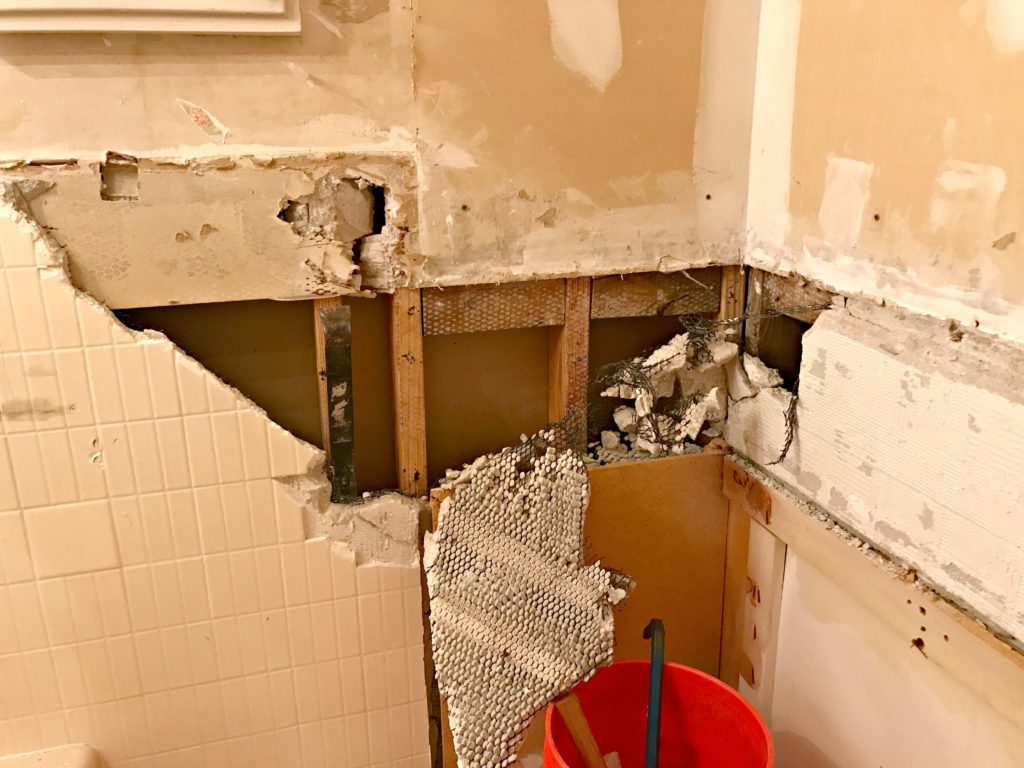 The key to removing mud wall is to find the studs and get the pry-bar behind the lathe on the studs. It’s no use to remove the tile from the cement. Just get behind all three layers and pry it off the studs. Once I got out of the corner and located the studs I was able to make faster progress. The walls started to come down in larger chunks. It still took me about two full days to remove all the mud walls.
 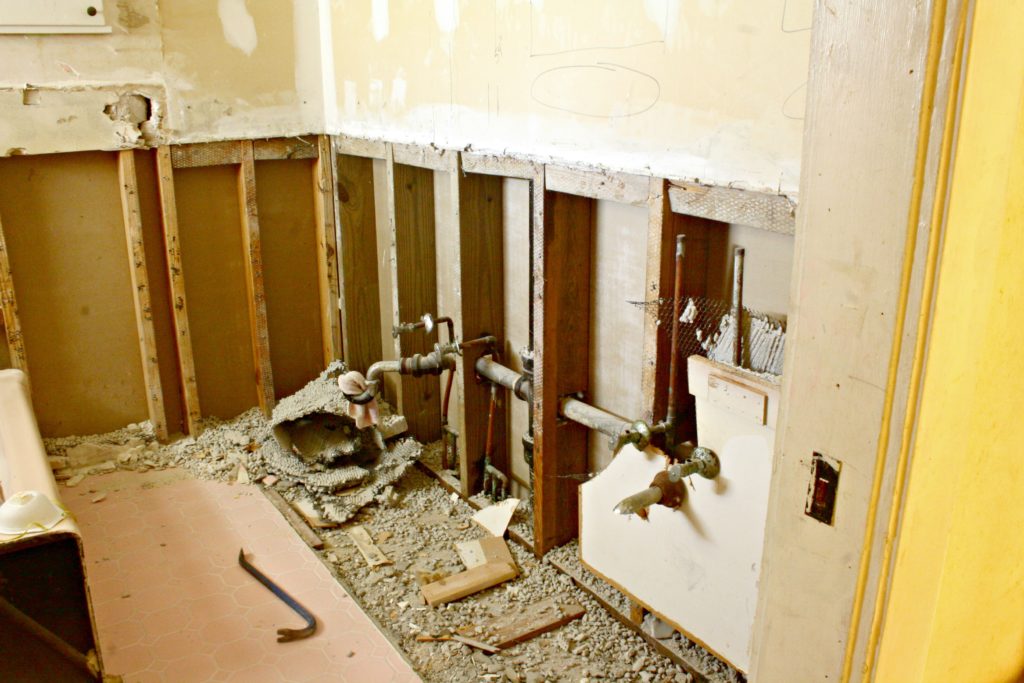 There’s copious amounts concrete rubble. The loose rubble I bagged in contractor bags in manageable size(light enough to carry)portions. The concrete filled lathe is so heavy and so dangerously sharp I had to put it into trash cans.
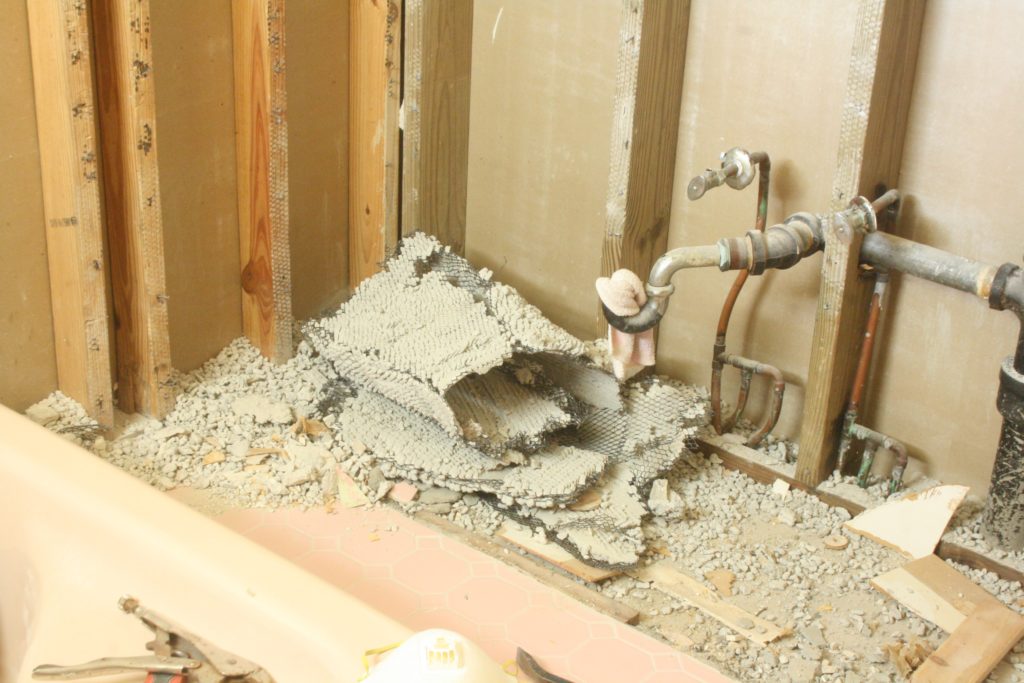 It’s super dusty work and requires a dust mask for sure as well as eye protection and gloves would be a great idea, although I didn’t have gloves and I managed to only come away with a few cuts, miraculously.
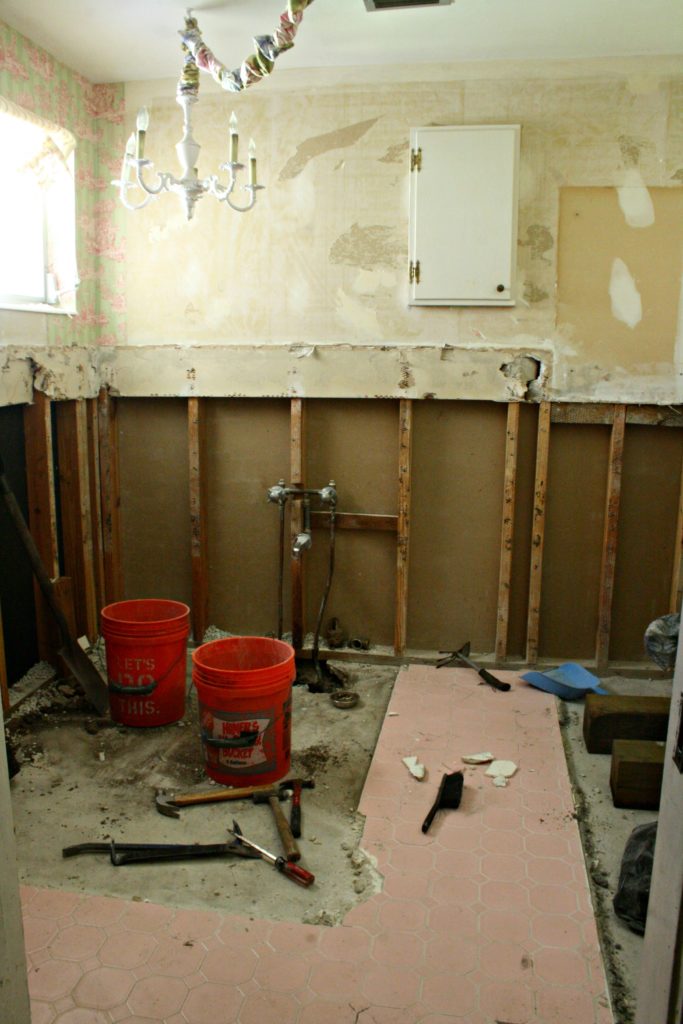 This morning Beast and I managed to remove the 400 pound cast iron bathtub. Yesterday I struggled and struggled to unhook the drain pipes from the bathtub only to find out today that the pipes were completely rotten in the ground and just crumbled in my hand after removing the tub. So much for all the time I spent with that huge heavy pipe wrench in a four inch space between the wall and the tub. grrr…
 No beautiful progress pictures yet but I can assure you when this project is complete I will certainly have abundant pictures of this bad boy. I can’t wait! In the meantime my next few steps before the plumber comes on Monday…